Address
304 North Cardinal St.
Dorchester Center, MA 02124
Work Hours
Monday to Friday: 7AM - 7PM
Weekend: 10AM - 5PM
Address
304 North Cardinal St.
Dorchester Center, MA 02124
Work Hours
Monday to Friday: 7AM - 7PM
Weekend: 10AM - 5PM

I had to root an Android device for a recent engagement, and I found myself using the Nexus Root Toolkit for this.
If you’ve never used the Nexus Root Toolkit, or it has been awhile since you have rooted an Android device, then you are in luck.
You can find the tool here, and I’ll walk through the simple process of rooting my Nexus 7.
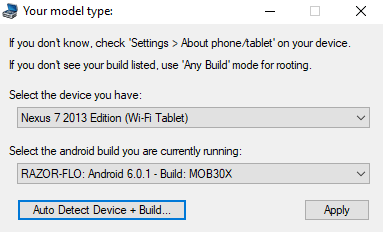
First, I set the mode type by clicking the “Change” button in that section.
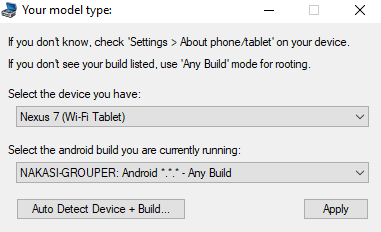
While these settings probably would have worked, I opted for the auto-detect mode.
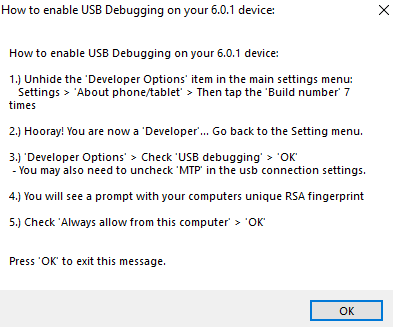
Next up, the tool prompted me to enable USB debugging. For more information on this, you can see my post about extracting Android Chrome tabs.
Finally, the build was properly set in the top left section of the application.
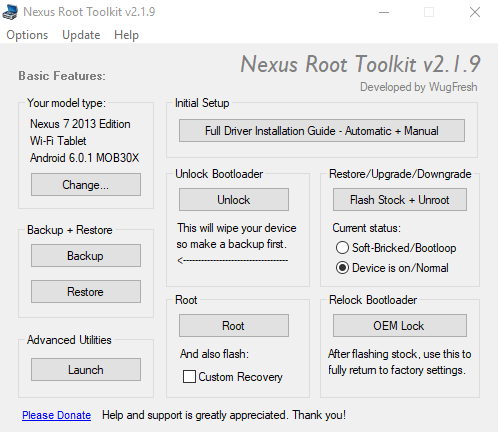
Next, I clicked on the “Root” button to begin the process. That said, I first had to update some dependencies on my end.
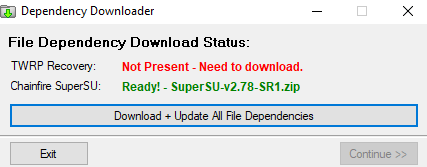
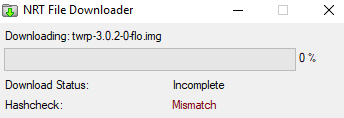
That said, when I tried to use the NRT File Downloader, I was getting a hash mismatch error.
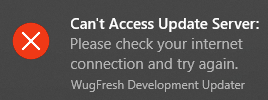
Additionally, I was also receiving an error about the application having trouble connecting to the update server.
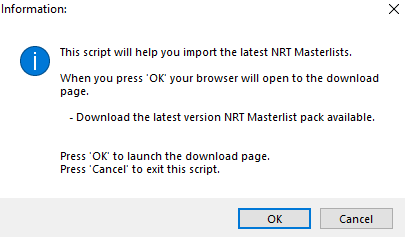
That said, once the dependency finally failed, I received an error message that would also allow me to download the file manually.

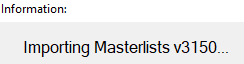
First, I had to manually update the masterlists.
As you can see from my earlier log output, the application was setup with the version 3135 masterlists.
Nexus Root Toolkit v2.1.9

Masterlists:
- LatestToolkitFiles.ini    3135
- AndroidDeviceListFull.ini    3135
- AndroidDeviceListFlash.ini    3135

RAZOR-FLO: Android 6.0.1 - Build: MOB30X

Live log initiated [2018-05-23]:
That said, once I went to the download page, I started to download v3150.
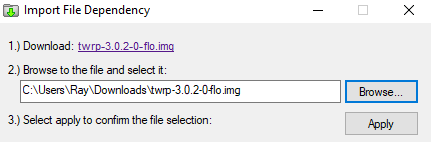
Once I updated the masterlist, I had to update the TWRP dependency.
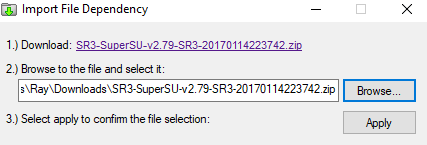
After I completed the manual process, and clicked “Apply”, it was time to update SuperSU.
With these processes completed, my dependencies were finally met!
Now, when I clicked the “Root” button, there were no more errors and I was able to go ahead.
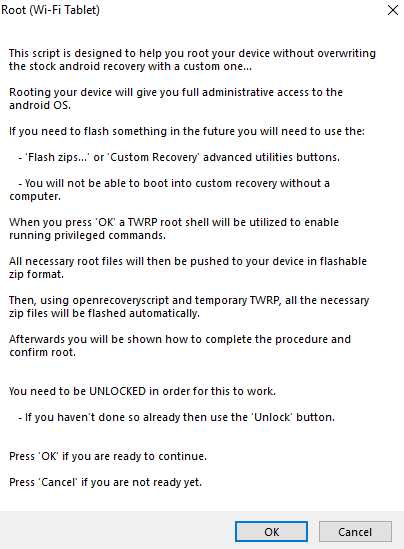
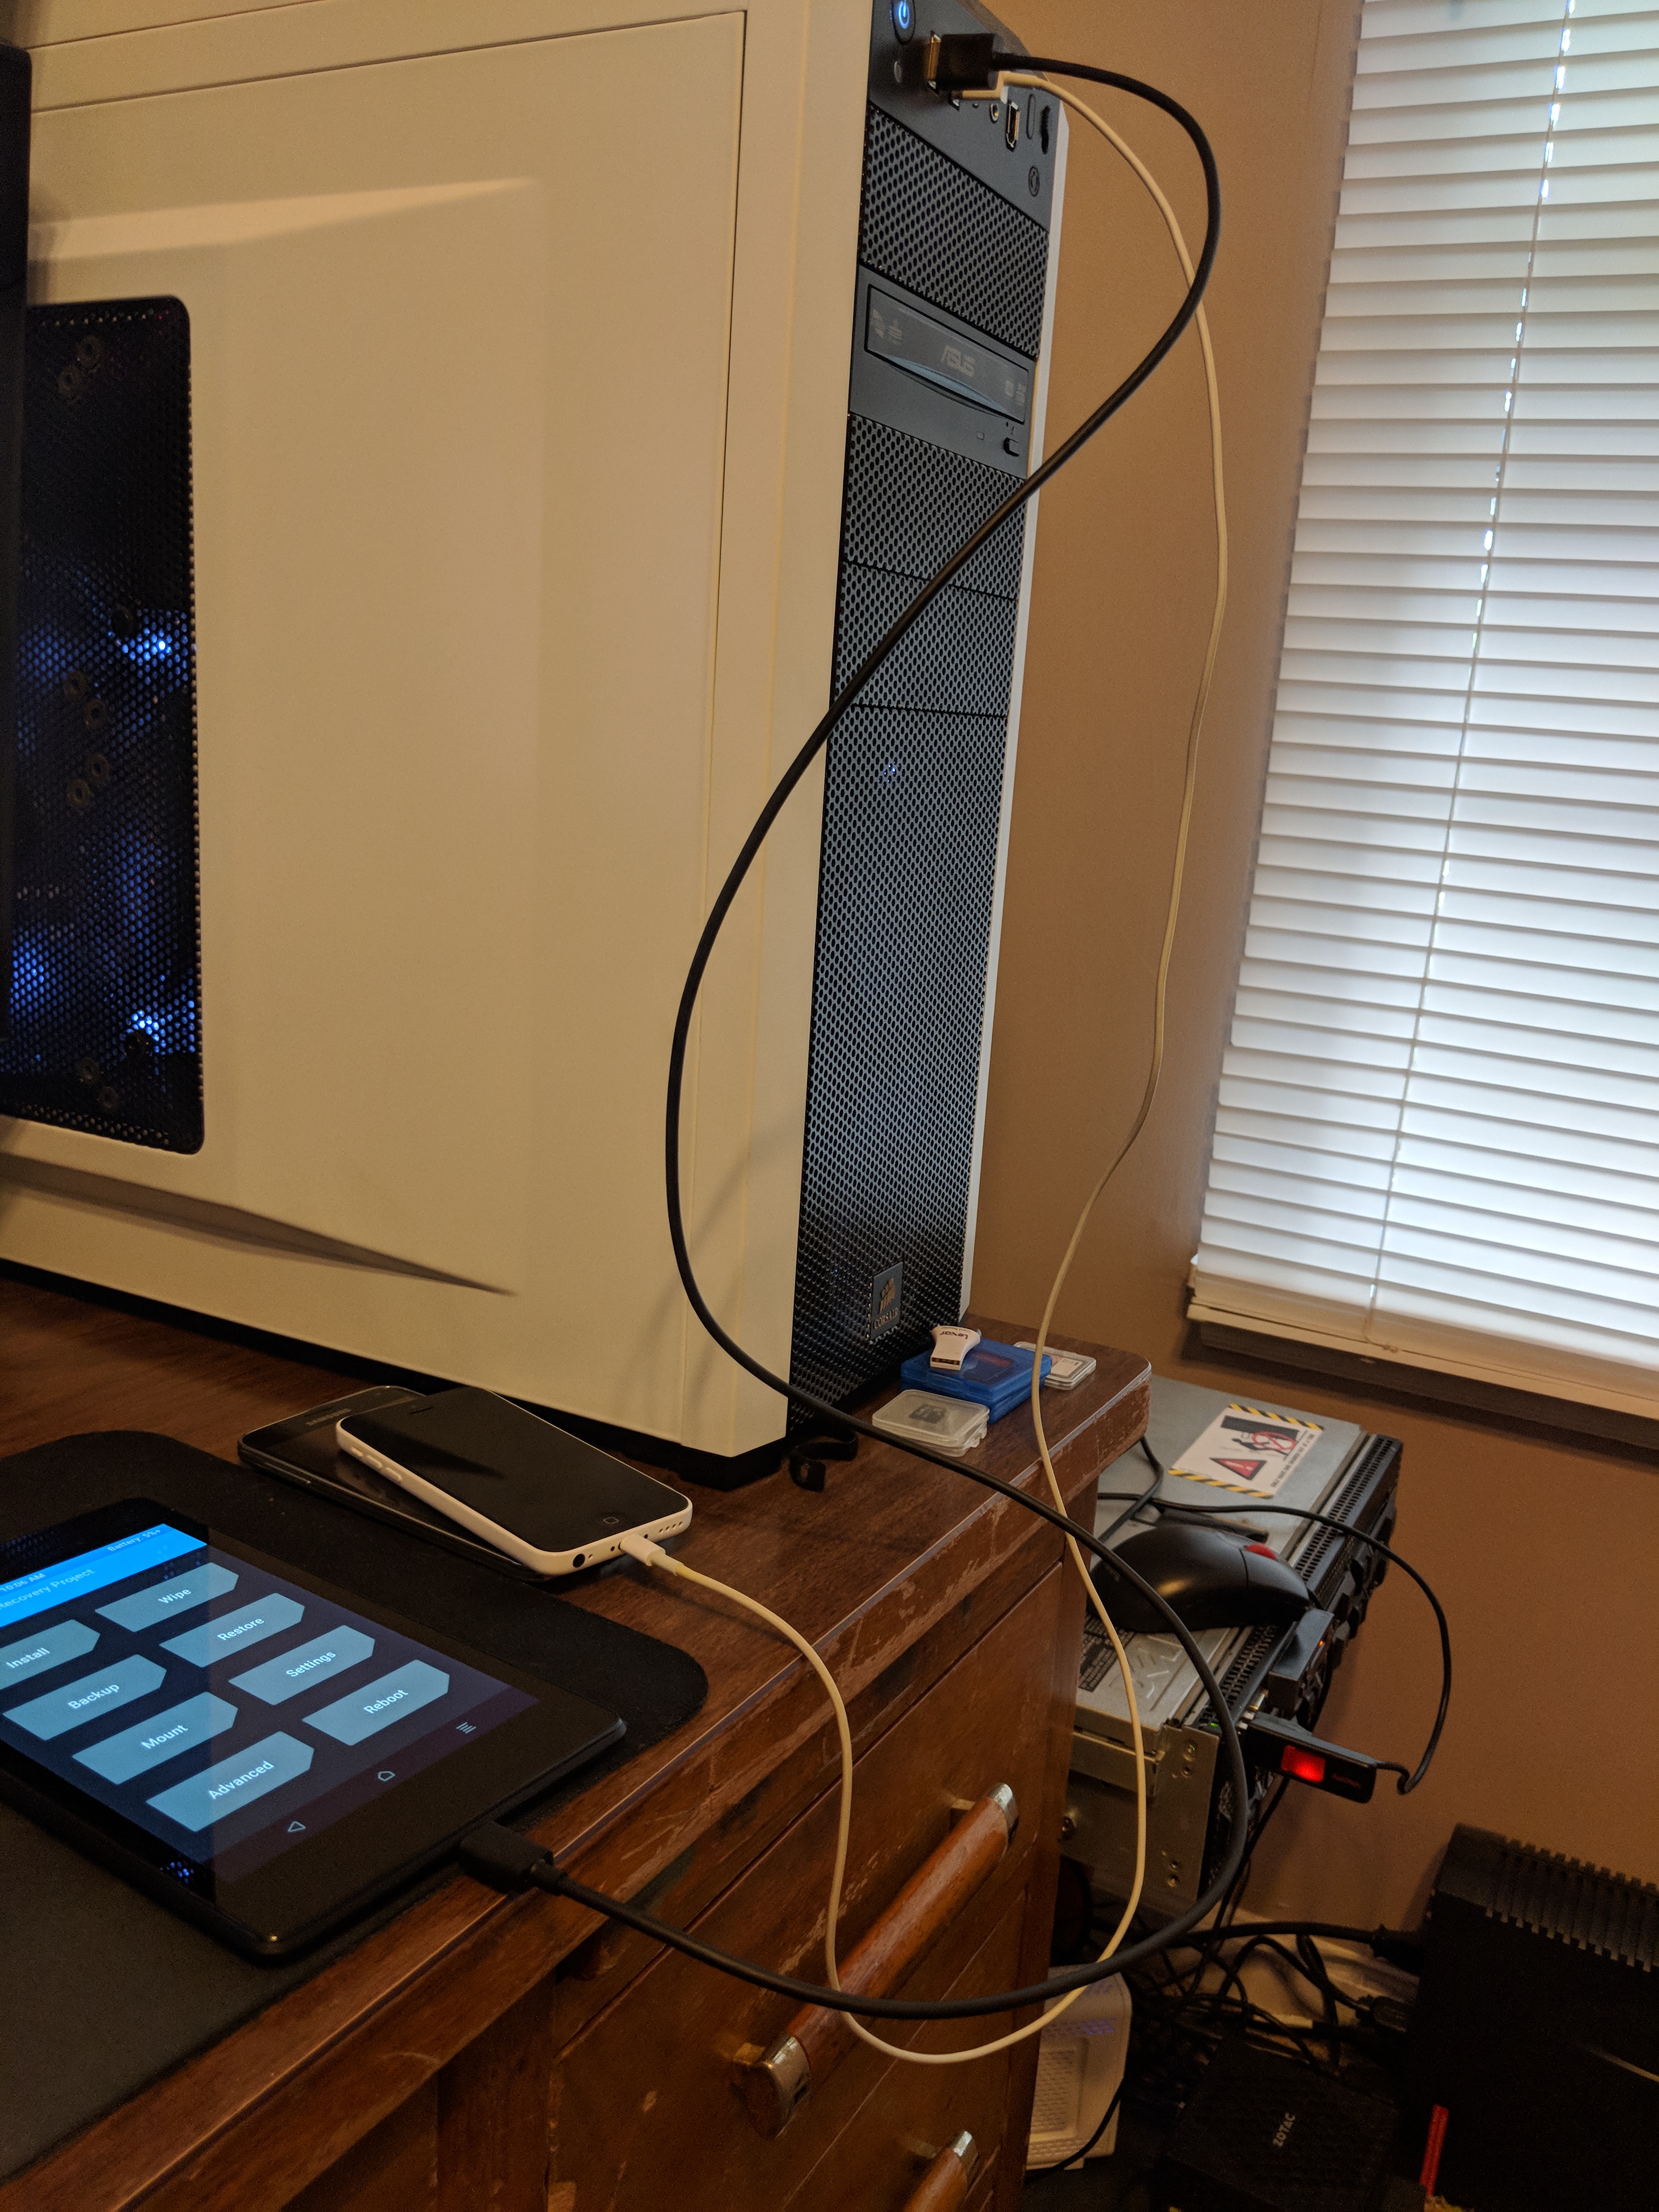
With my device connected, I was able to begin the process.
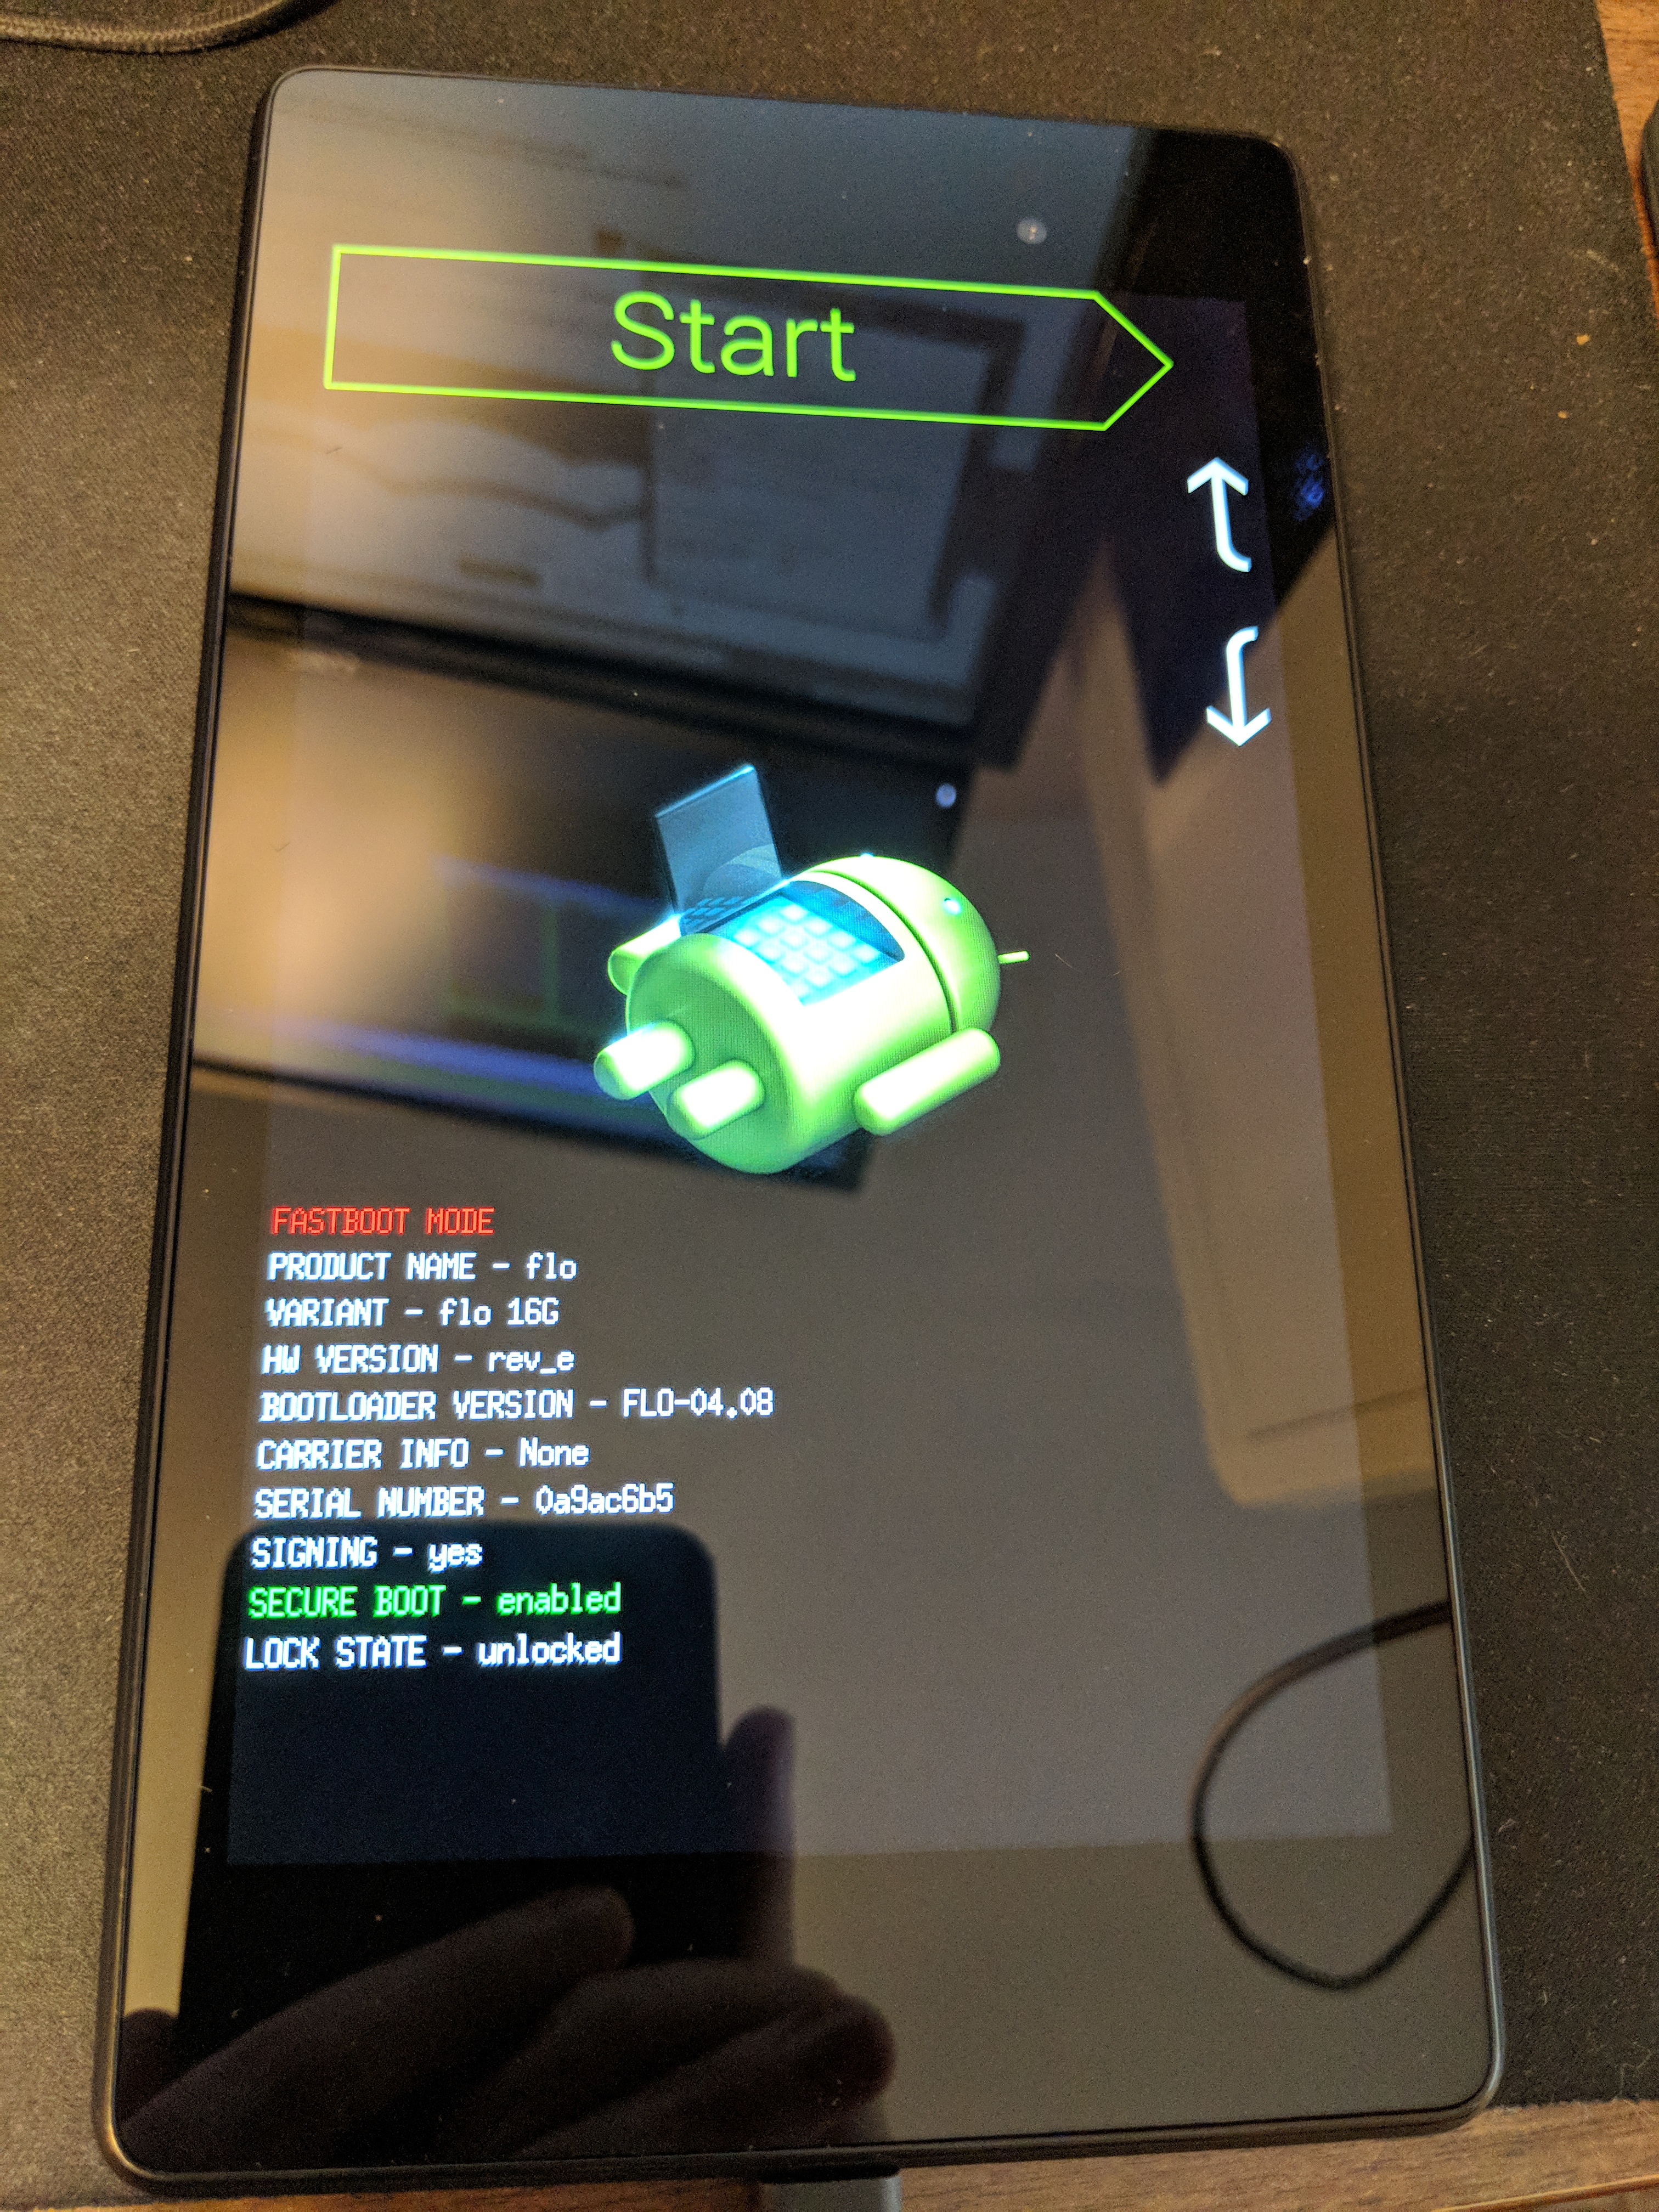
First, once the device rebooted, I clicked the “Start” button.
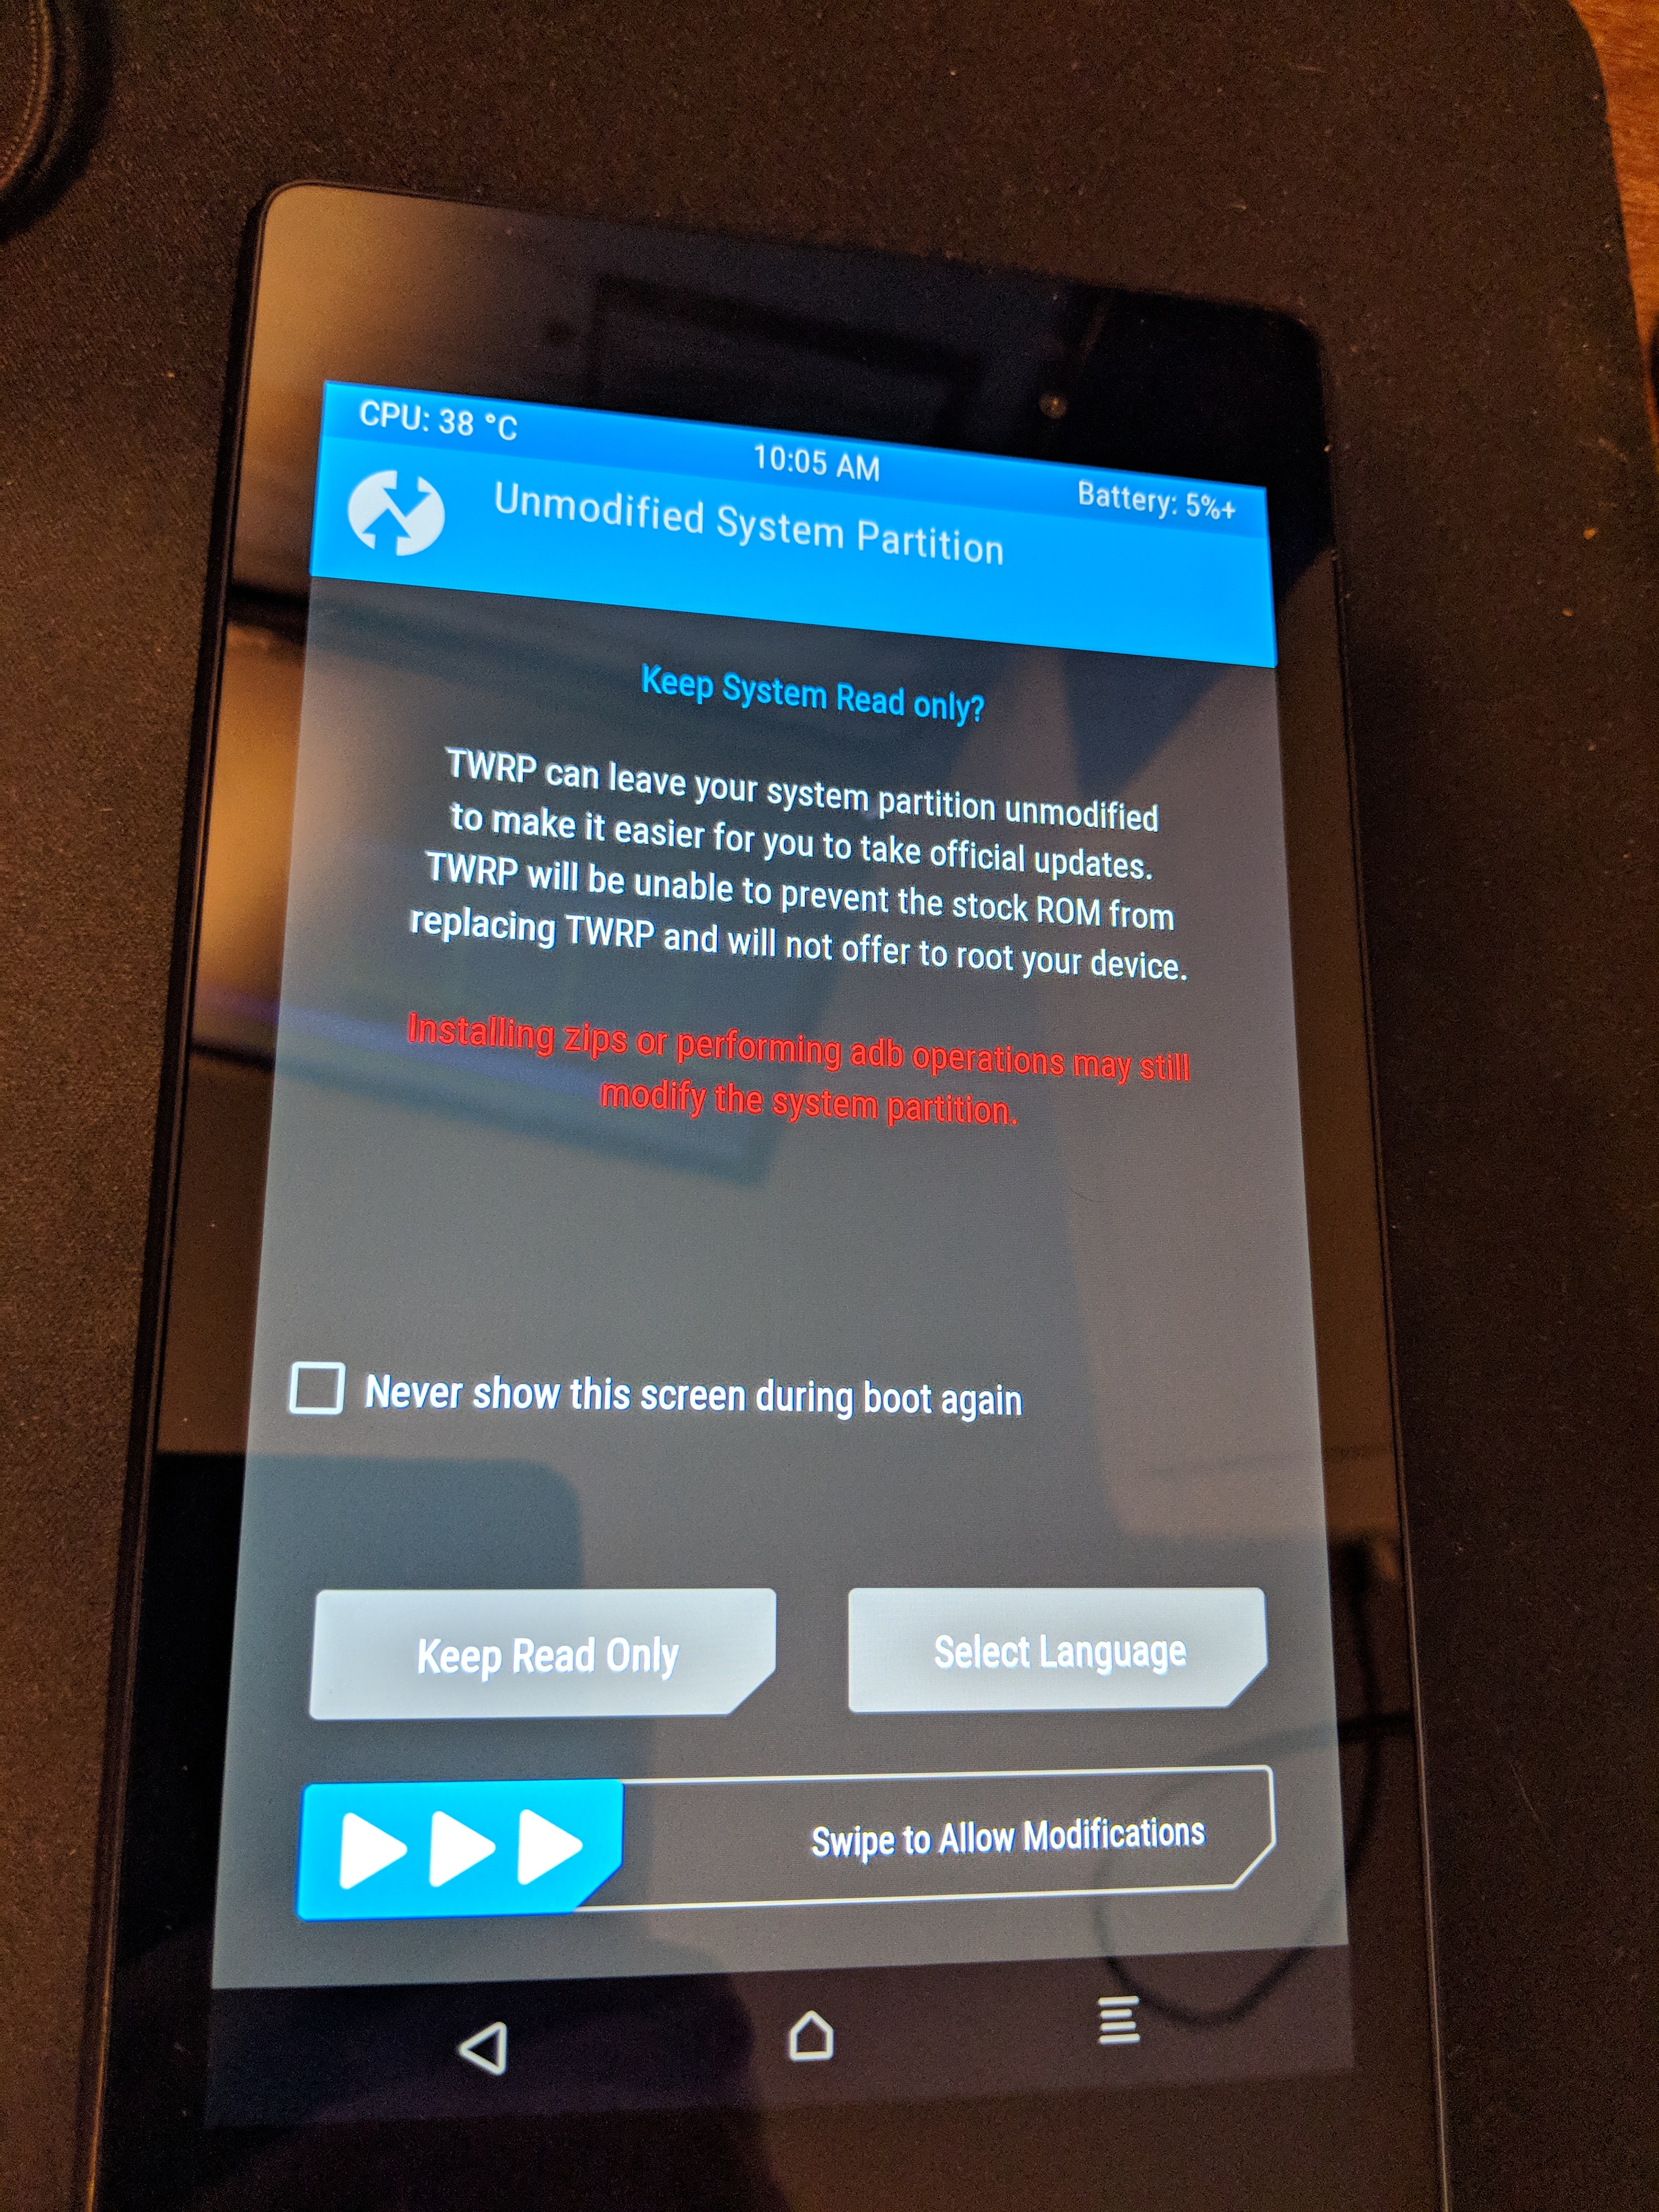
This eventually brought up TWRP, and I allowed it to modify my system partition.
Once I followed the steps, the log started displaying the files being pushed to the device.

Finally, the process completed, and I received a success message!
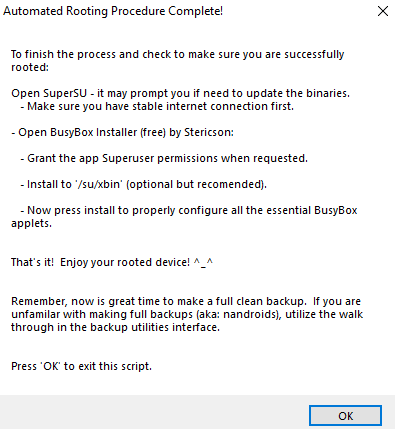
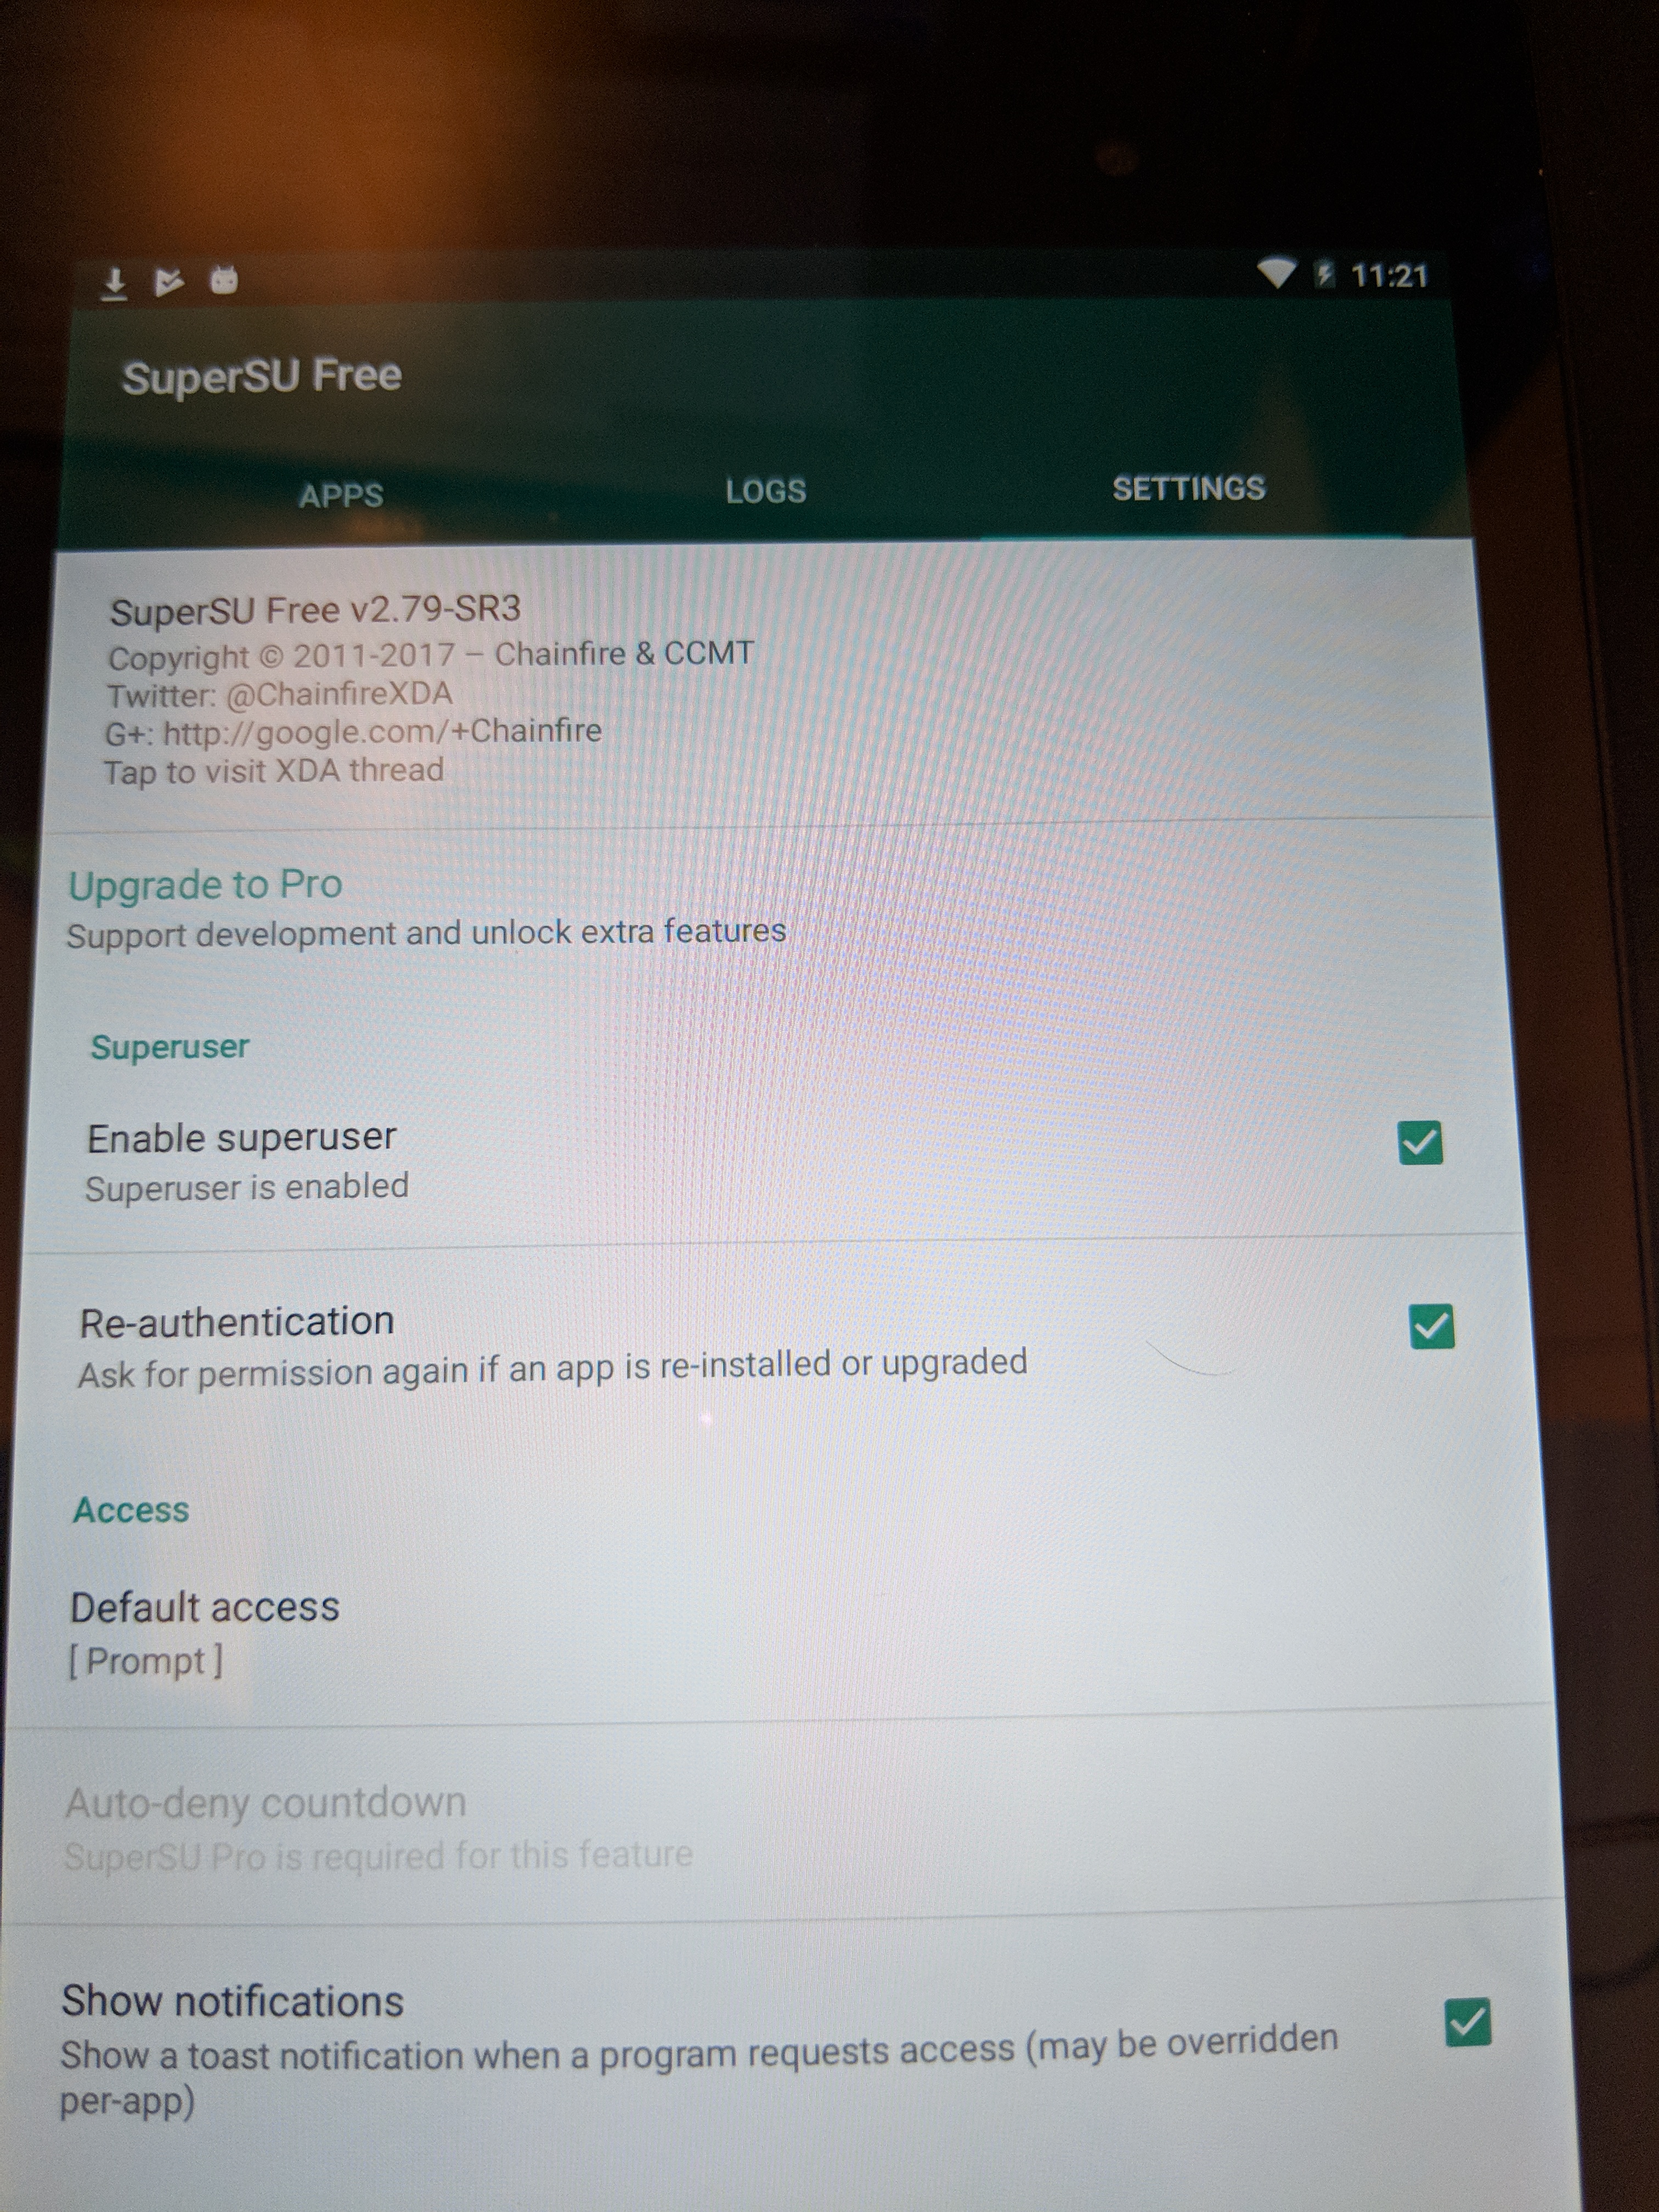
Once my device rebooted, I first verified that I had installed SuperSU.
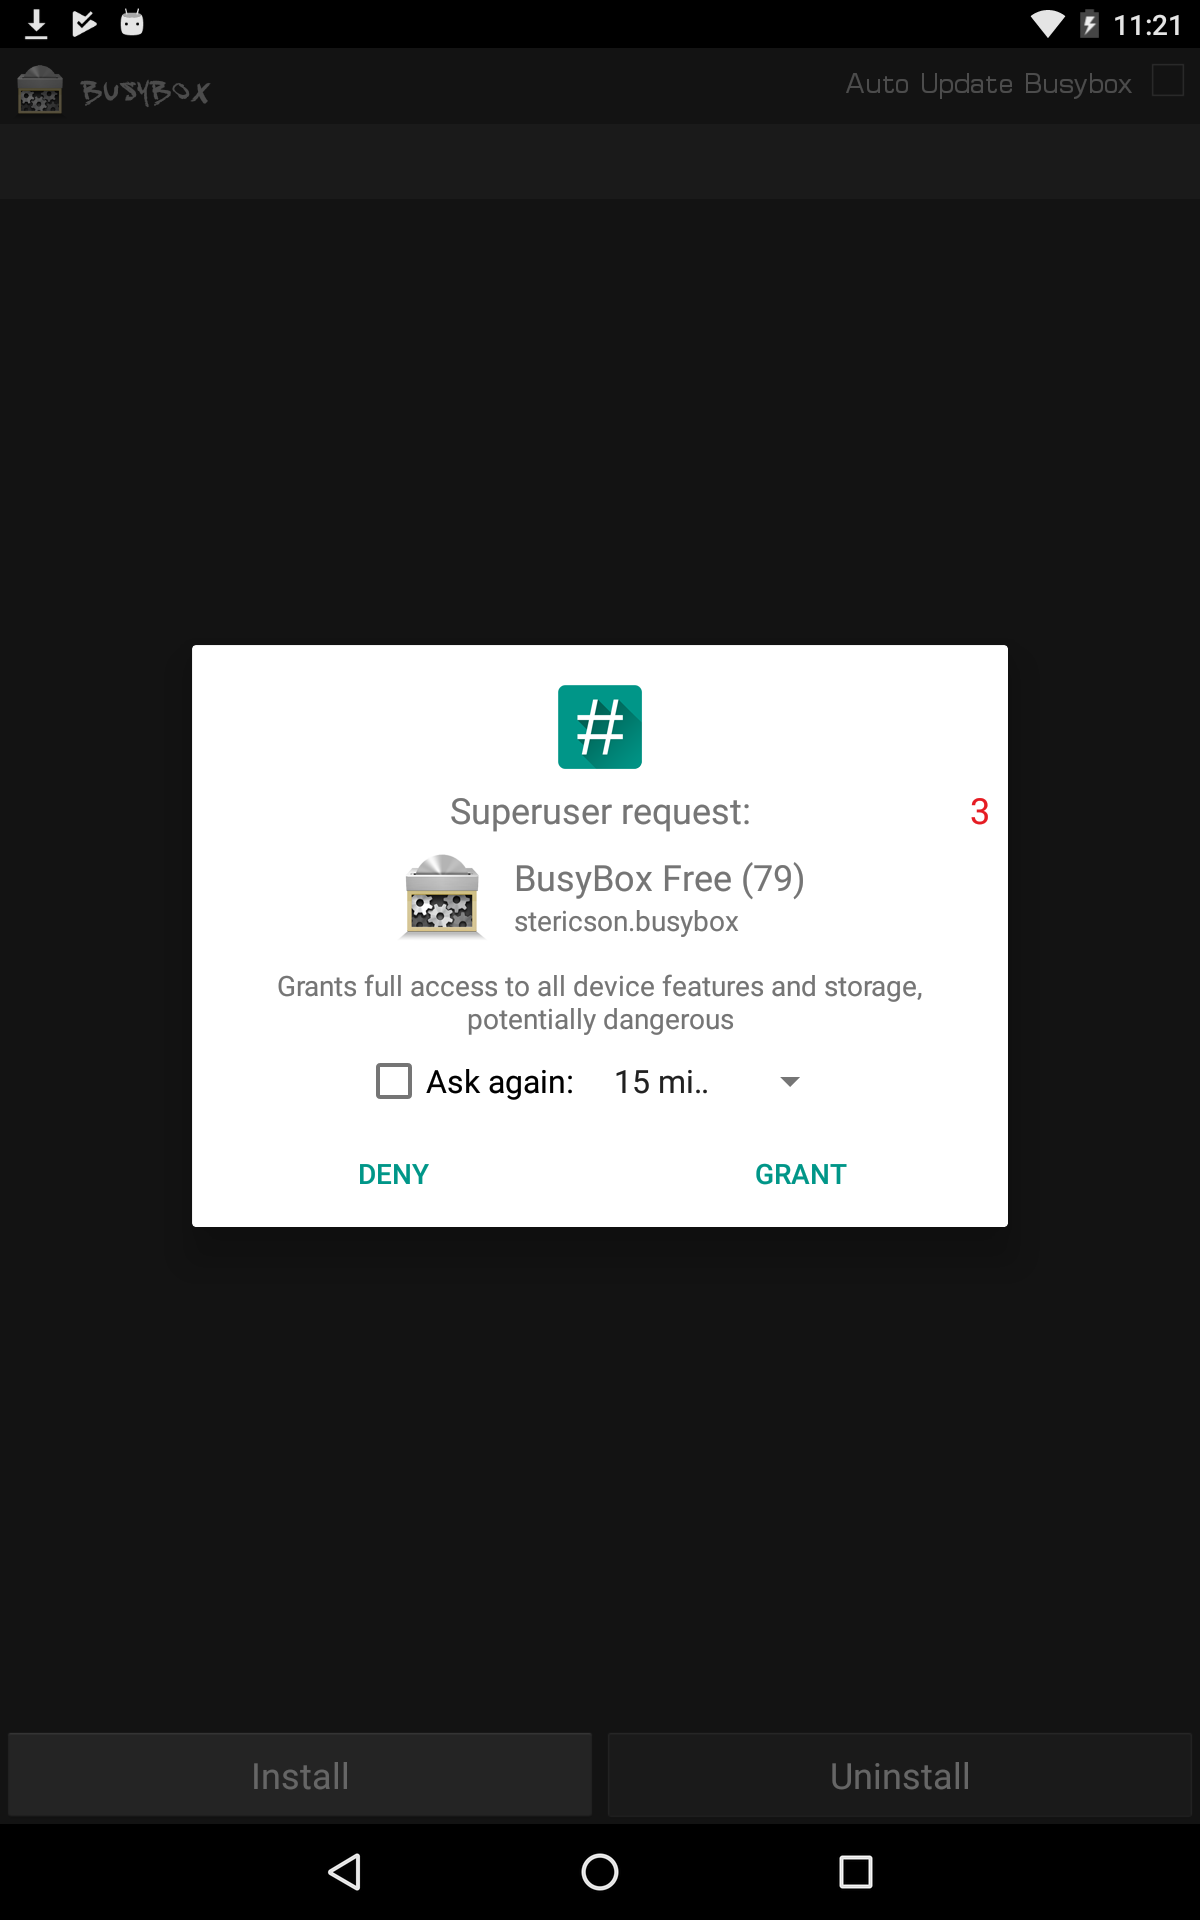
Next, I attempted to open BusyBox and allowed it root access.
Finally, I updated all the packages inside of BusyBox.

While I ran into a few issues here and there, this was still the easiest rooting process that I have gone through.
I’ve now got my tablet setup for Android engagements, and engagements will be easier in the future!
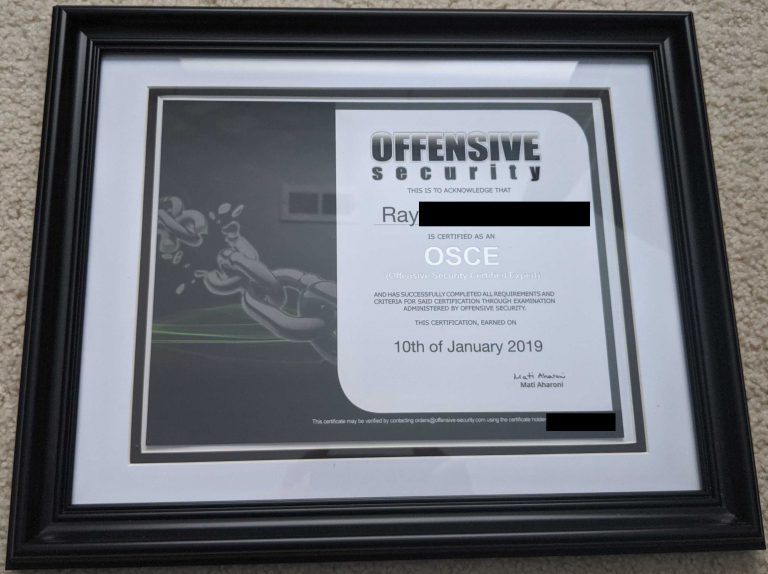
Ray Doyle is an avid pentester/security enthusiast/beer connoisseur who has worked in IT for almost 16 years now. From building machines and the software on them, to breaking into them and tearing it all down; he’s done it all. To show for it, he has obtained an OSCE, OSCP, eCPPT, GXPN, eWPT, eWPTX, SLAE, eMAPT, Security+, ICAgile CP, ITIL v3 Foundation, and even a sabermetrics certification!
He currently serves as a Senior Staff Adversarial Engineer for Avalara, and his previous position was a Principal Penetration Testing Consultant for Secureworks.
This page contains links to products that I may receive compensation from at no additional cost to you. View my Affiliate Disclosure page here. As an Amazon Associate, I earn from qualifying purchases.