Address
304 North Cardinal St.
Dorchester Center, MA 02124
Work Hours
Monday to Friday: 7AM - 7PM
Weekend: 10AM - 5PM
Address
304 North Cardinal St.
Dorchester Center, MA 02124
Work Hours
Monday to Friday: 7AM - 7PM
Weekend: 10AM - 5PM

In keeping with the VPN theme, here’s a quick guide on setting up a DigitalOcean VPN with strongSwan.
strongSwan is, “an open-source IPsec-based VPN Solution.” While I don’t necessary need another VPN solution, this will prove useful in another upcoming post.
As you may know, I’m already doing most of my hosting on DigitalOcean, so setting it up there just made it a little easier to manage. That said, you could follow these steps on any Ubuntu system, or modify them where appropriate.
Most of this post was based on the following two tutorials, so I highly recommend checking them out as well!
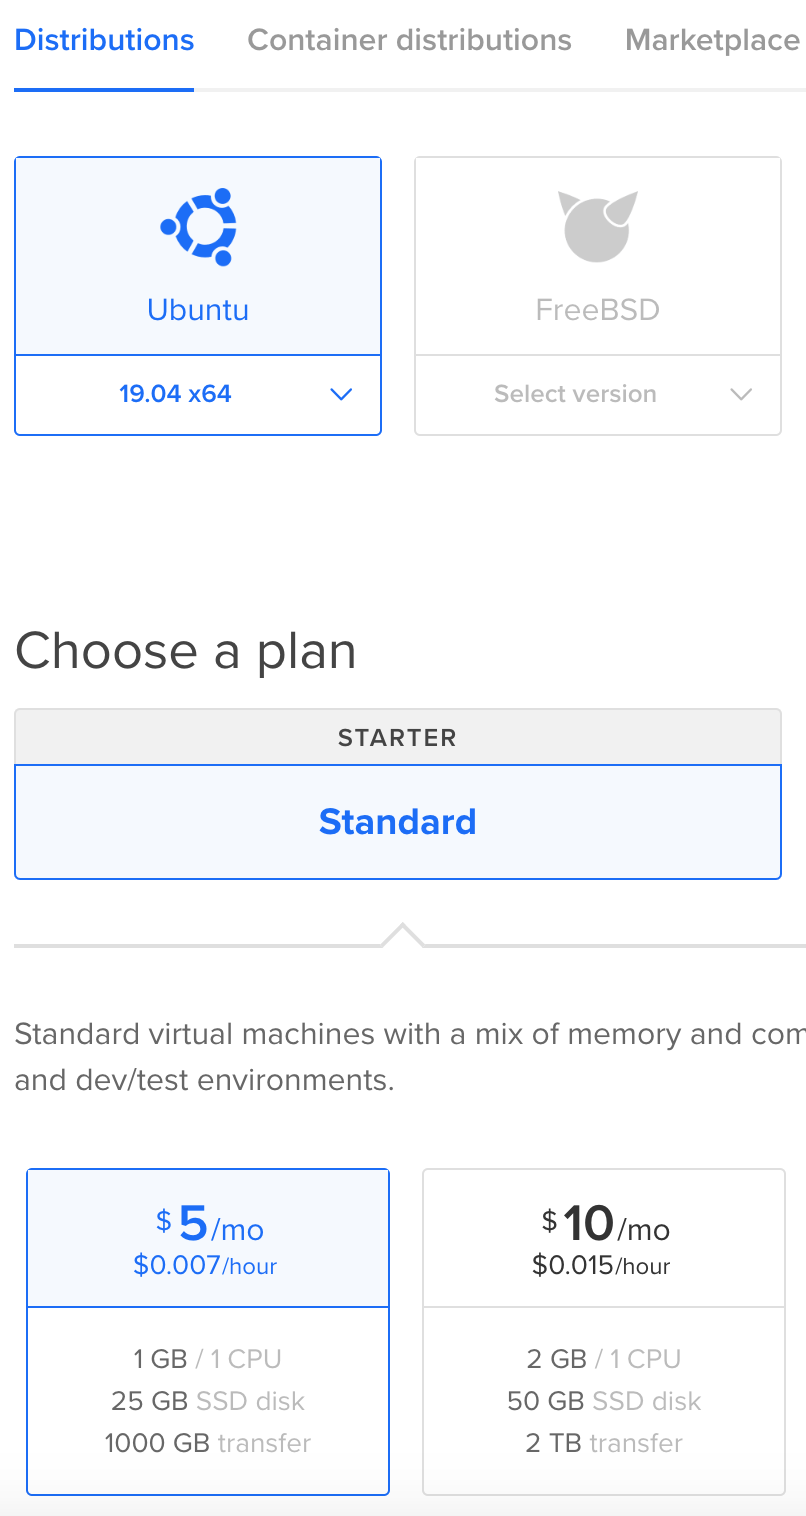
First, I created a new, basic droplet.
When I first logged in, I ran any necessary updates and upgrades, to make sure that the system was good to go.
root@ubuntu-vpn:~# apt-get update && apt-get upgrade
Get:1 http://mirrors.digitalocean.com/ubuntu disco InRelease [257 kB]
Get:2 http://mirrors.digitalocean.com/ubuntu disco-updates InRelease [88.4 kB]
Get:3 http://mirrors.digitalocean.com/ubuntu disco-backports InRelease [66.2 kB]
First, I installed strongSwan and the strongswan-pki package.
root@ubuntu-vpn:~# apt-get install strongswan strongswan-pki
Reading package lists... Done
Building dependency tree
Reading state information... Done
The following additional packages will be installed:
  libcharon-standard-plugins libstrongswan libstrongswan-standard-plugins strongswan-charon strongswan-libcharon strongswan-starter
Suggested packages:
  libstrongswan-extra-plugins libcharon-extra-plugins
The following NEW packages will be installed:
  libcharon-standard-plugins libstrongswan libstrongswan-standard-plugins strongswan strongswan-charon strongswan-libcharon strongswan-pki strongswan-starter
0 upgraded, 8 newly installed, 0 to remove and 0 not upgraded.
Need to get 929 kB of archives.
After this operation, 4379 kB of additional disk space will be used.
Do you want to continue? [Y/n] y
This was all I needed to do for the installation, so it was time to move on to configuration!
First, I created some directories to store the certificates that I would be creating.
root@ubuntu-vpn:~# mkdir -p ~/pki/{cacerts,certs,private}
root@ubuntu-vpn:~# chmod 700 pki/
Next, I generated my root key.
root@ubuntu-vpn:~# ipsec pki --gen --type rsa --size 4096 --outform pem > ~/pki/private/ca-key.pem
Using the root key for signing, I created a root certificate authority. Note that I used something generic, but feel free to changed the distinguished name (DN) value.
root@ubuntu-vpn:~# ipsec pki --self --ca --lifetime 3650 --in ~/pki/private/ca-key.pem --type rsa --dn "CN=VPN root CA" --outform pem > ~/pki/cacerts/ca-cert.pem
With my Certificate Authority created, it was time to create a certificate for the VPN server.
First, I created a private key for the server.
root@ubuntu-vpn:~# ipsec pki --gen --type rsa --size 4096 --outform pem > ~/pki/private/server-key.pem
Next, I created and signed the server certificate using the previously created private key. Note that I configured the distinguished name (DN) and subject alternate name (SAN) to match the IP of my VPN server. You can also configure these to match the hostname that you will be using, if you prefer that instead.
root@ubuntu-vpn:~# ipsec pki --pub --in ~/pki/private/server-key.pem --type rsa | ipsec pki --issue --lifetime 1825 --cacert ~/pki/cacerts/ca-cert.pem --cakey ~/pki/private/ca-key.pem --dn "CN=138.x.x.x" --san "138.x.x.x" --flag serverAuth --flag ikeIntermediate --outform pem > ~/pki/certs/server-cert.pem
With all of my files created, I copied over everything to the ipsec.d directory.
root@ubuntu-vpn:~# cp -r ~/pki/* /etc/ipsec.d/
With all the required certificates created and moved, I could finally move on to the actual configuration.
First, I backed up the original configuration file before making any changes.
root@ubuntu-vpn:~# mv /etc/ipsec.conf{,.original}
Next, I opened a new, blank configuration file.
root@ubuntu-vpn:~# vi /etc/ipsec.conf
I’ll try to cover the configuration file as best as possible, but I highly recommend you read over the previously linked tutorials on the DigitalOcean community if you have further questions.
The following configuration file will create an IKEv2 VPN on my server that allows duplicate connections using my previously generated certificates. Additionally, it will use EAS-MSCHAPv2 for authentication, and give clients an IP in the 10.10.10.0/24 range.
root@ubuntu-vpn:~# cat /etc/ipsec.conf
config setup
    charondebug="ike 1, knl 1, cfg 0"
    uniqueids=no

conn ikev2-vpn
    auto=add
    compress=no
    type=tunnel
    keyexchange=ikev2
    fragmentation=yes
    forceencaps=yes

    dpdaction=clear
    dpdelay=300s
    rekey=no

    left=%any
    leftid=138.x.x.x
    leftcert=server-cert.pem
    leftsendcert=always
    leftsubnet=0.0.0.0/0

    right=%any
    rightid=%any
    rightauth=eap-mschapv2
    rightsourceip=10.10.10.0/24
    rightdns=8.8.8.8,8.8.4.4
    rightsendcert=never

    eap_identity=%identity
With my configuration file created, I moved onto the ipsec.secrets file. The server uses this file for the location of the server private key, as well as any user authentication information.
root@ubuntu-vpn:~# cat /etc/ipsec.secrets
# This file holds shared secrets or RSA private keys for authentication.

# RSA private key for this host, authenticating it to any other host
# which knows the public part.

: RSA "server-key.pem"

<username> : EAP "<password>"
With my test user created, I restarted the strongSwan service.
root@ubuntu-vpn:~# systemctl restart strongswan
Once I finshed configuring strongSwan, I moved on to the iptables rules.
As you can see, I started off with a completely empty list of rules.
root@ubuntu-vpn:~# iptables -L
Chain INPUT (policy ACCEPT)
target     prot opt source               destination

Chain FORWARD (policy ACCEPT)
target     prot opt source               destination

Chain OUTPUT (policy ACCEPT)
target     prot opt source               destination
I’m no iptables wizard, so I’m not going to cover each of these commands individually. That said, the strongSwan on Ubuntu 16.04 tutorial does a great job breaking down what each one does.
Make sure that any of your IP information, as well as interface (highlighted) is correct. I initially ran into some problems, but that’s because I was typing eth0 instead of ens3.
root@ubuntu-vpn:~# iptables -A INPUT -m state --state ESTABLISHED,RELATED -j ACCEPT
root@ubuntu-vpn:~# iptables -A INPUT -p tcp --dport 22 -j ACCEPT
root@ubuntu-vpn:~# iptables -A INPUT -i lo -j ACCEPT
root@ubuntu-vpn:~# iptables -A INPUT -p udp --dport  500 -j ACCEPT
root@ubuntu-vpn:~# iptables -A INPUT -p udp --dport 4500 -j ACCEPT
root@ubuntu-vpn:~# iptables -A FORWARD --match policy --pol ipsec --dir in  --proto esp -s 10.10.10.10/24 -j ACCEPT
root@ubuntu-vpn:~# iptables -A FORWARD --match policy --pol ipsec --dir out --proto esp -d 10.10.10.10/24 -j ACCEPT
root@ubuntu-vpn:~# iptables -t nat -A POSTROUTING -s 10.10.10.10/24 -o ens3 -m policy --pol ipsec --dir out -j ACCEPT
root@ubuntu-vpn:~# iptables -t nat -A POSTROUTING -s 10.10.10.10/24 -o ens3 -j MASQUERADE
root@ubuntu-vpn:~# iptables -t mangle -A FORWARD --match policy --pol ipsec --dir in -s 10.10.10.10/24 -o ens3 -p tcp -m tcp --tcp-flags SYN,RST SYN -m tcpmss --mss 1361:1536 -j TCPMSS --set-mss 1360
root@ubuntu-vpn:~# iptables -A INPUT -j DROP
root@ubuntu-vpn:~# iptables -A FORWARD -j DROP
When all was said and done, my iptables rules looked like the following.
root@ubuntu-vpn:~# iptables -L
Chain INPUT (policy ACCEPT)
target     prot opt source               destination
ACCEPT     all  --  anywhere             anywhere             state RELATED,ESTABLISHED
ACCEPT     tcp  --  anywhere             anywhere             tcp dpt:ssh
ACCEPT     all  --  anywhere             anywhere
ACCEPT     udp  --  anywhere             anywhere             udp dpt:isakmp
ACCEPT     udp  --  anywhere             anywhere             udp dpt:ipsec-nat-t
DROP       all  --  anywhere             anywhere

Chain FORWARD (policy ACCEPT)
target     prot opt source               destination
ACCEPT     all  --  10.10.10.0/24        anywhere             policy match dir in pol ipsec proto esp
ACCEPT     all  --  anywhere             10.10.10.0/24        policy match dir out pol ipsec proto esp
DROP       all  --  anywhere             anywhere

Chain OUTPUT (policy ACCEPT)
target     prot opt source               destination
To persist my iptables information, I just used the iptables-save and iptables-restore commands.
root@ubuntu-vpn:~# iptables-save > /etc/iptables.conf
root@ubuntu-vpn:~# cat /etc/iptables.conf
# Generated by iptables-save v1.6.1 on Sun May  5 00:44:00 2019
*mangle
:PREROUTING ACCEPT [587:494402]
:INPUT ACCEPT [561:491790]
:FORWARD ACCEPT [26:2612]
:OUTPUT ACCEPT [500:66005]
:POSTROUTING ACCEPT [526:68617]
-A FORWARD -s 10.10.10.0/24 -o ens3 -p tcp -m policy --dir in --pol ipsec -m tcp --tcp-flags SYN,RST SYN -m tcpmss --mss 1361:1536 -j TCPMSS --set-mss 1360

... <snip> ...

-A FORWARD -j DROP
COMMIT
# Completed on Sun May  5 00:44:00 2019
In addition to the iptables rules, I also made a few changes to /etc/sysctl.conf. I’ve highlighted the changes below, but they perform the following functions.
root@ubuntu-vpn:~# cat /etc/sysctl.conf
#
# /etc/sysctl.conf - Configuration file for setting system variables
# See /etc/sysctl.d/ for additional system variables.
# See sysctl.conf (5) for information.
#

...

# Uncomment the next line to enable packet forwarding for IPv4
net.ipv4.ip_forward=1

...

# Do not accept ICMP redirects (prevent MITM attacks)
net.ipv4.conf.all.accept_redirects = 0

...

# Do not send ICMP redirects (we are not a router)
net.ipv4.conf.all.send_redirects = 0

...

net.ipv4.ip_no_pmtu_disc = 1
With everything configured, I wanted to test the connection on my Windows system.
First, I grabbed the CA certificate from my server.
root@ubuntu-vpn:~# cat /etc/ipsec.d/cacerts/ca-cert.pem
Next, I installed it by opening mmc.exe and following these steps.
After setting up a new VPN connection, I was running into some errors.
It turns out that strongSwan needs some additional configuration when it comes to Mac OS or Windows clients.
First, I added the following lines to my ipsec.conf file.
ike=aes256-sha1-modp1024,aes128-sha1-modp1024,3des-sha1-modp1024!
esp=aes256-sha256,aes256-sha1,3des-sha1!
I was also getting some authentication errors. This was due to a missing EAP plugin that I also had to install.
root@ubuntu-vpn:~# apt-get install libcharon-extra-plugins
Reading package lists... Done
Building dependency tree
Reading state information... Done
The following additional packages will be installed:
  dbus-user-session dconf-gsettings-backend dconf-service glib-networking glib-networking-common
  glib-networking-services gsettings-desktop-schemas libdconf1 libldns2 libmysqlclient20 libpcsclite1
  libproxy1v5 libsoup2.4-1 libstrongswan-extra-plugins libtspi1 libunbound8 mysql-common
  strongswan-tnc-base
Suggested packages:
  pcscd strongswan-tnc-ifmap strongswan-tnc-pdp
The following NEW packages will be installed:
  dbus-user-session dconf-gsettings-backend dconf-service glib-networking glib-networking-common
  glib-networking-services gsettings-desktop-schemas libcharon-extra-plugins libdconf1 libldns2
  libmysqlclient20 libpcsclite1 libproxy1v5 libsoup2.4-1 libstrongswan-extra-plugins libtspi1
  libunbound8 mysql-common strongswan-tnc-base
With my changes made, I restarted strongSwan.
root@ubuntu-vpn:~# service strongswan restart
When I attempted to connect to the VPN this time, it was successful, and I got my IP information.
PPP adapter VPN Connection:

   Connection-specific DNS Suffix  . :
   Description . . . . . . . . . . . : VPN Connection
   Physical Address. . . . . . . . . :
   DHCP Enabled. . . . . . . . . . . : No
   Autoconfiguration Enabled . . . . : Yes
   IPv4 Address. . . . . . . . . . . : 10.10.10.1(Preferred)
   Subnet Mask . . . . . . . . . . . : 255.255.255.255
   Default Gateway . . . . . . . . . :
   DNS Servers . . . . . . . . . . . : 8.8.8.8
                                       8.8.4.4
   NetBIOS over Tcpip. . . . . . . . : Enabled
Note that you may need to make some changes if you wish to send all your traffic over a VPN in Windows.
With the testing complete on my Windows host, I also wanted to get the VPN working on my Kali instance.
As before, I copied over the CA certificate to my client box.
root@ubuntu-vpn:~# cat /etc/ipsec.d/cacerts/ca-cert.pem

...

root@kali:~/vpn# vi vpn_root_certificate.pem
For Linux, I decided to install charon-cmd, to connect to the VPN on an as-needed basis.
root@kali:~/vpn# apt-get install charon-cmd libcharon-extra-plugins
Reading package lists... Done
Building dependency tree
Reading state information... Done
The following packages were automatically installed and are no longer required:
  libavahi-gobject0 libfolks-telepathy25 libgail-3-0 libgcab-1.0-0 libgfortran4 libgtk2-perl
  libmission-control-plugins0 libpango-perl libtelepathy-glib0 magictree
  python-backports.ssl-match-hostname python-pam telepathy-mission-control-5 x11proto-dri2-dev
  x11proto-gl-dev
Use 'apt autoremove' to remove them.
The following additional packages will be installed:
  libstrongswan libstrongswan-standard-plugins strongswan-libcharon
Suggested packages:
  libstrongswan-extra-plugins
The following NEW packages will be installed:
  charon-cmd libcharon-extra-plugins libstrongswan libstrongswan-standard-plugins strongswan-libcharon
0 upgraded, 5 newly installed, 0 to remove and 1229 not upgraded.
Need to get 1,299 kB of archives.
After this operation, 4,030 kB of additional disk space will be used.
Do you want to continue? [Y/n] y
When I finished the install, it was just a matter of supplying the CA certificate, VPN host, username, and the ike-proposal method that I wanted to use.
root@kali:~/vpn# charon-cmd --cert vpn_root_certificate.pem --host 138.x.x.x --identity <username> --ike-proposal aes256-sha1-modp1024
00[LIB] dropped capabilities, running as uid 0, gid 0
00[DMN] Starting charon-cmd IKE client (strongSwan 5.7.2, Linux 4.17.0-kali1-686-pae, i686)
00[LIB] loaded plugins: charon-cmd aesni aes rc2 sha2 sha1 md5 mgf1 random nonce x509 revocation constraints pubkey pkcs1 pkcs7 pkcs8 pkcs12 sshkey pem openssl fips-prf gmp agent xcbc hmac gcm kernel-netlink resolve socket-default bypass-lan eap-identity eap-md5 eap-gtc eap-mschapv2 eap-tls eap-ttls xauth-generic
00[JOB] spawning 16 worker threads
06[IKE] installed bypass policy for 192.168.5.0/24
07[IKE] initiating IKE_SA cmd[1] to 138.x.x.x
07[ENC] generating IKE_SA_INIT request 0 [ SA KE No N(NATD_S_IP) N(NATD_D_IP) N(HASH_ALG) N(REDIR_SUP) ]
07[NET] sending packet: from 192.168.5.82[35440] to 138.x.x.x[4500] (328 bytes)
09[NET] received packet: from 138.x.x.x[4500] to 192.168.5.82[35440] (328 bytes)
09[ENC] parsed IKE_SA_INIT response 0 [ SA KE No N(NATD_S_IP) N(NATD_D_IP) N(HASH_ALG) N(MULT_AUTH) ]
09[CFG] selected proposal: IKE:AES_CBC_256/HMAC_SHA1_96/PRF_HMAC_SHA1/MODP_1024
09[IKE] local host is behind NAT, sending keep alives
09[IKE] remote host is behind NAT
09[IKE] sending cert request for "CN=VPN root CA"
09[IKE] establishing CHILD_SA cmd{1}
09[ENC] generating IKE_AUTH request 1 [ IDi N(INIT_CONTACT) CERTREQ CPRQ(ADDR DNS) SA TSi TSr N(MOBIKE_SUP) N(NO_ADD_ADDR) N(MULT_AUTH) N(EAP_ONLY) N(MSG_ID_SYN_SUP) ]
09[NET] sending packet: from 192.168.5.82[60898] to 138.x.x.x[4500] (316 bytes)
10[NET] received packet: from 138.x.x.x[4500] to 192.168.5.82[60898] (1916 bytes)
10[ENC] parsed IKE_AUTH response 1 [ IDr CERT AUTH EAP/REQ/ID ]
10[IKE] received end entity cert "CN=138.x.x.x"
10[CFG]   using certificate "CN=138.x.x.x"
10[CFG]   using trusted ca certificate "CN=VPN root CA"
10[CFG] checking certificate status of "CN=138.x.x.x"
10[CFG] certificate status is not available
10[CFG]   reached self-signed root ca with a path length of 0

... <snip> ...

14[ENC] generating INFORMATIONAL request 9 [ N(NATD_S_IP) N(NATD_D_IP) ]
14[NET] sending packet: from 192.168.5.82[34065] to 138.x.x.x[4500] (124 bytes)
15[NET] received packet: from 138.x.x.x[4500] to 192.168.5.82[34065] (124 bytes)
To verify my connection, I grabbed my IP information from ipinfo.io, which confirmed that the VPN was working!
root@kali:~/vpn# curl http://ipinfo.io
{
  "ip": "138.x.x.x",
  "city": "Santa Clara",
  "region": "California",
  "country": "US",
  "loc": "37.3501,-121.9850",
  "postal": "95051",
  "phone": "408",
  "org": "AS14061 DigitalOcean, LLC"
}
This was a longer post, but it was surprisingly simple to setup a custom strongSwan VPN on a droplet.
I’m not sure if I will use this much with my other available options, but it is nice to have in my back pocket.
That said, this post will serve as a pre-requisite for an upcoming aggressive post that I’ve wanted to write for some time.
Ray Doyle is an avid pentester/security enthusiast/beer connoisseur who has worked in IT for almost 16 years now. From building machines and the software on them, to breaking into them and tearing it all down; he’s done it all. To show for it, he has obtained an OSCE, OSCP, eCPPT, GXPN, eWPT, eWPTX, SLAE, eMAPT, Security+, ICAgile CP, ITIL v3 Foundation, and even a sabermetrics certification!
He currently serves as a Senior Staff Adversarial Engineer for Avalara, and his previous position was a Principal Penetration Testing Consultant for Secureworks.
This page contains links to products that I may receive compensation from at no additional cost to you. View my Affiliate Disclosure page here. As an Amazon Associate, I earn from qualifying purchases.