Address
304 North Cardinal St.
Dorchester Center, MA 02124
Work Hours
Monday to Friday: 7AM - 7PM
Weekend: 10AM - 5PM
Address
304 North Cardinal St.
Dorchester Center, MA 02124
Work Hours
Monday to Friday: 7AM - 7PM
Weekend: 10AM - 5PM
While it has taken a little, I am finally getting around to the Proxmark assembly.
We (Eversec) won the Proxmark3 RDV2 kit as a prize for our 2nd place finish in the DerbyCon CTF.
It was fairly easy to assemble, and came with the only tool required (a tiny Allen wrench) to put it together.
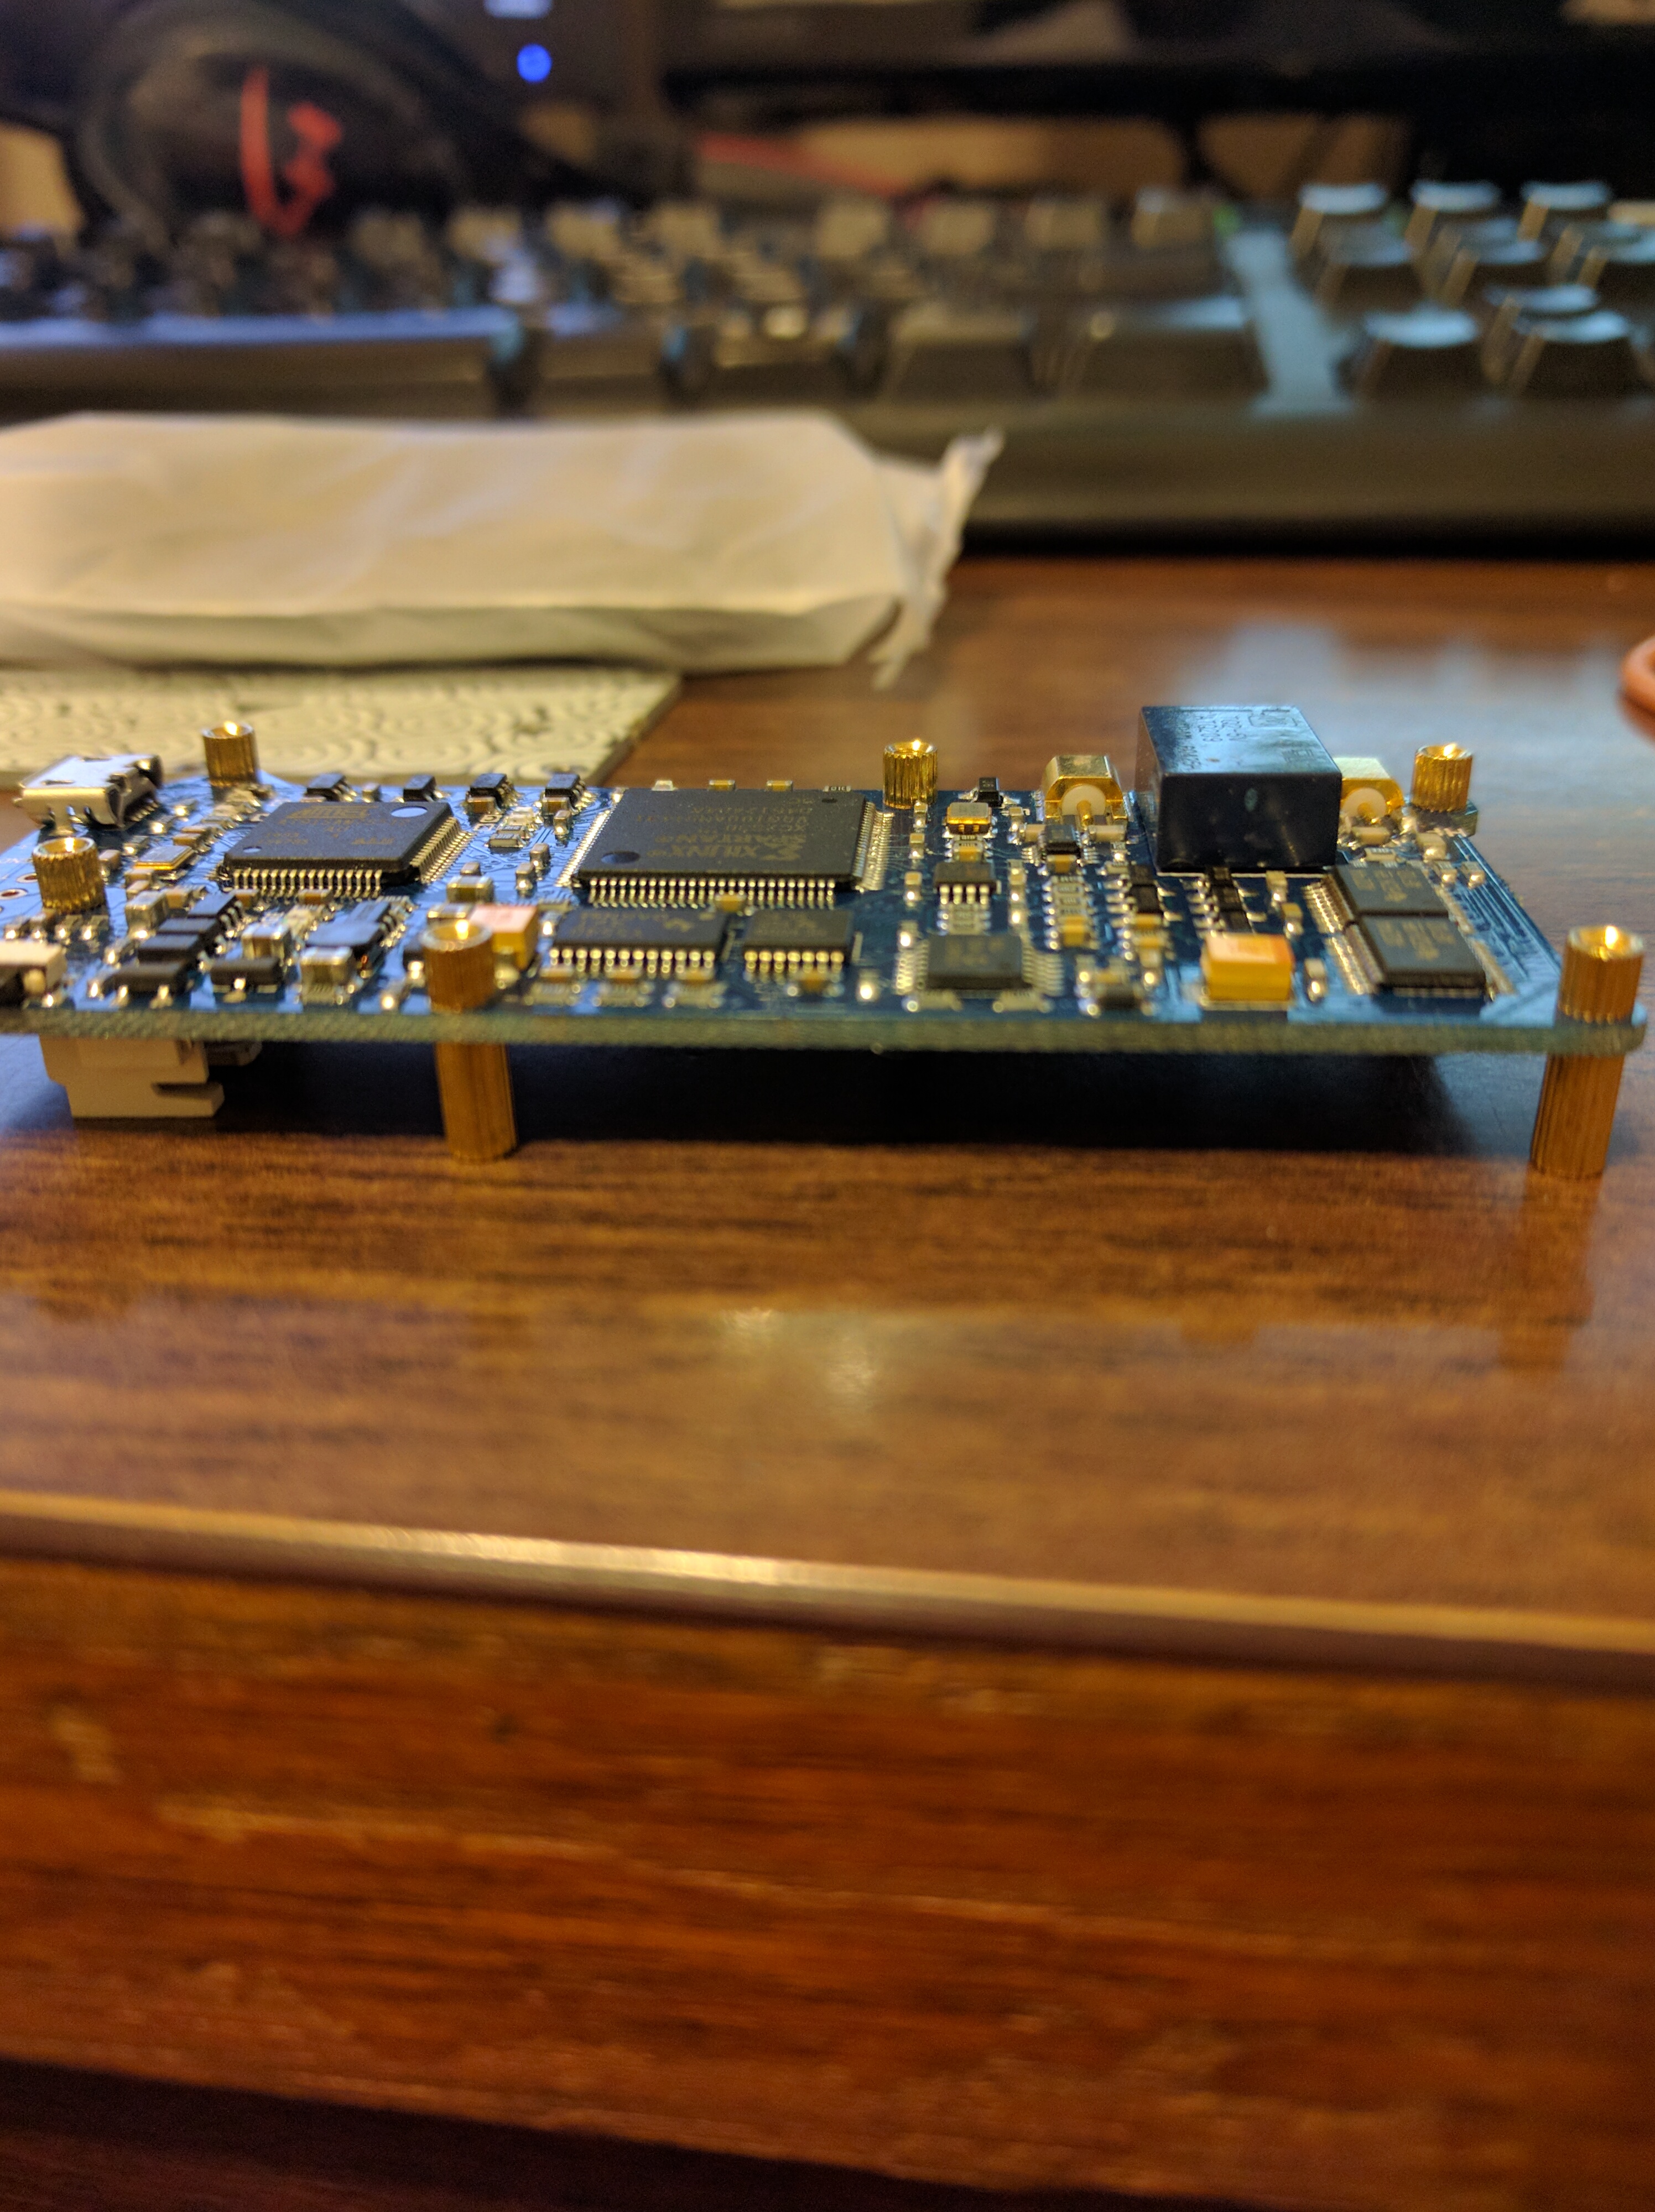
To start, I laid out all the parts and pieces to see what I was working with.
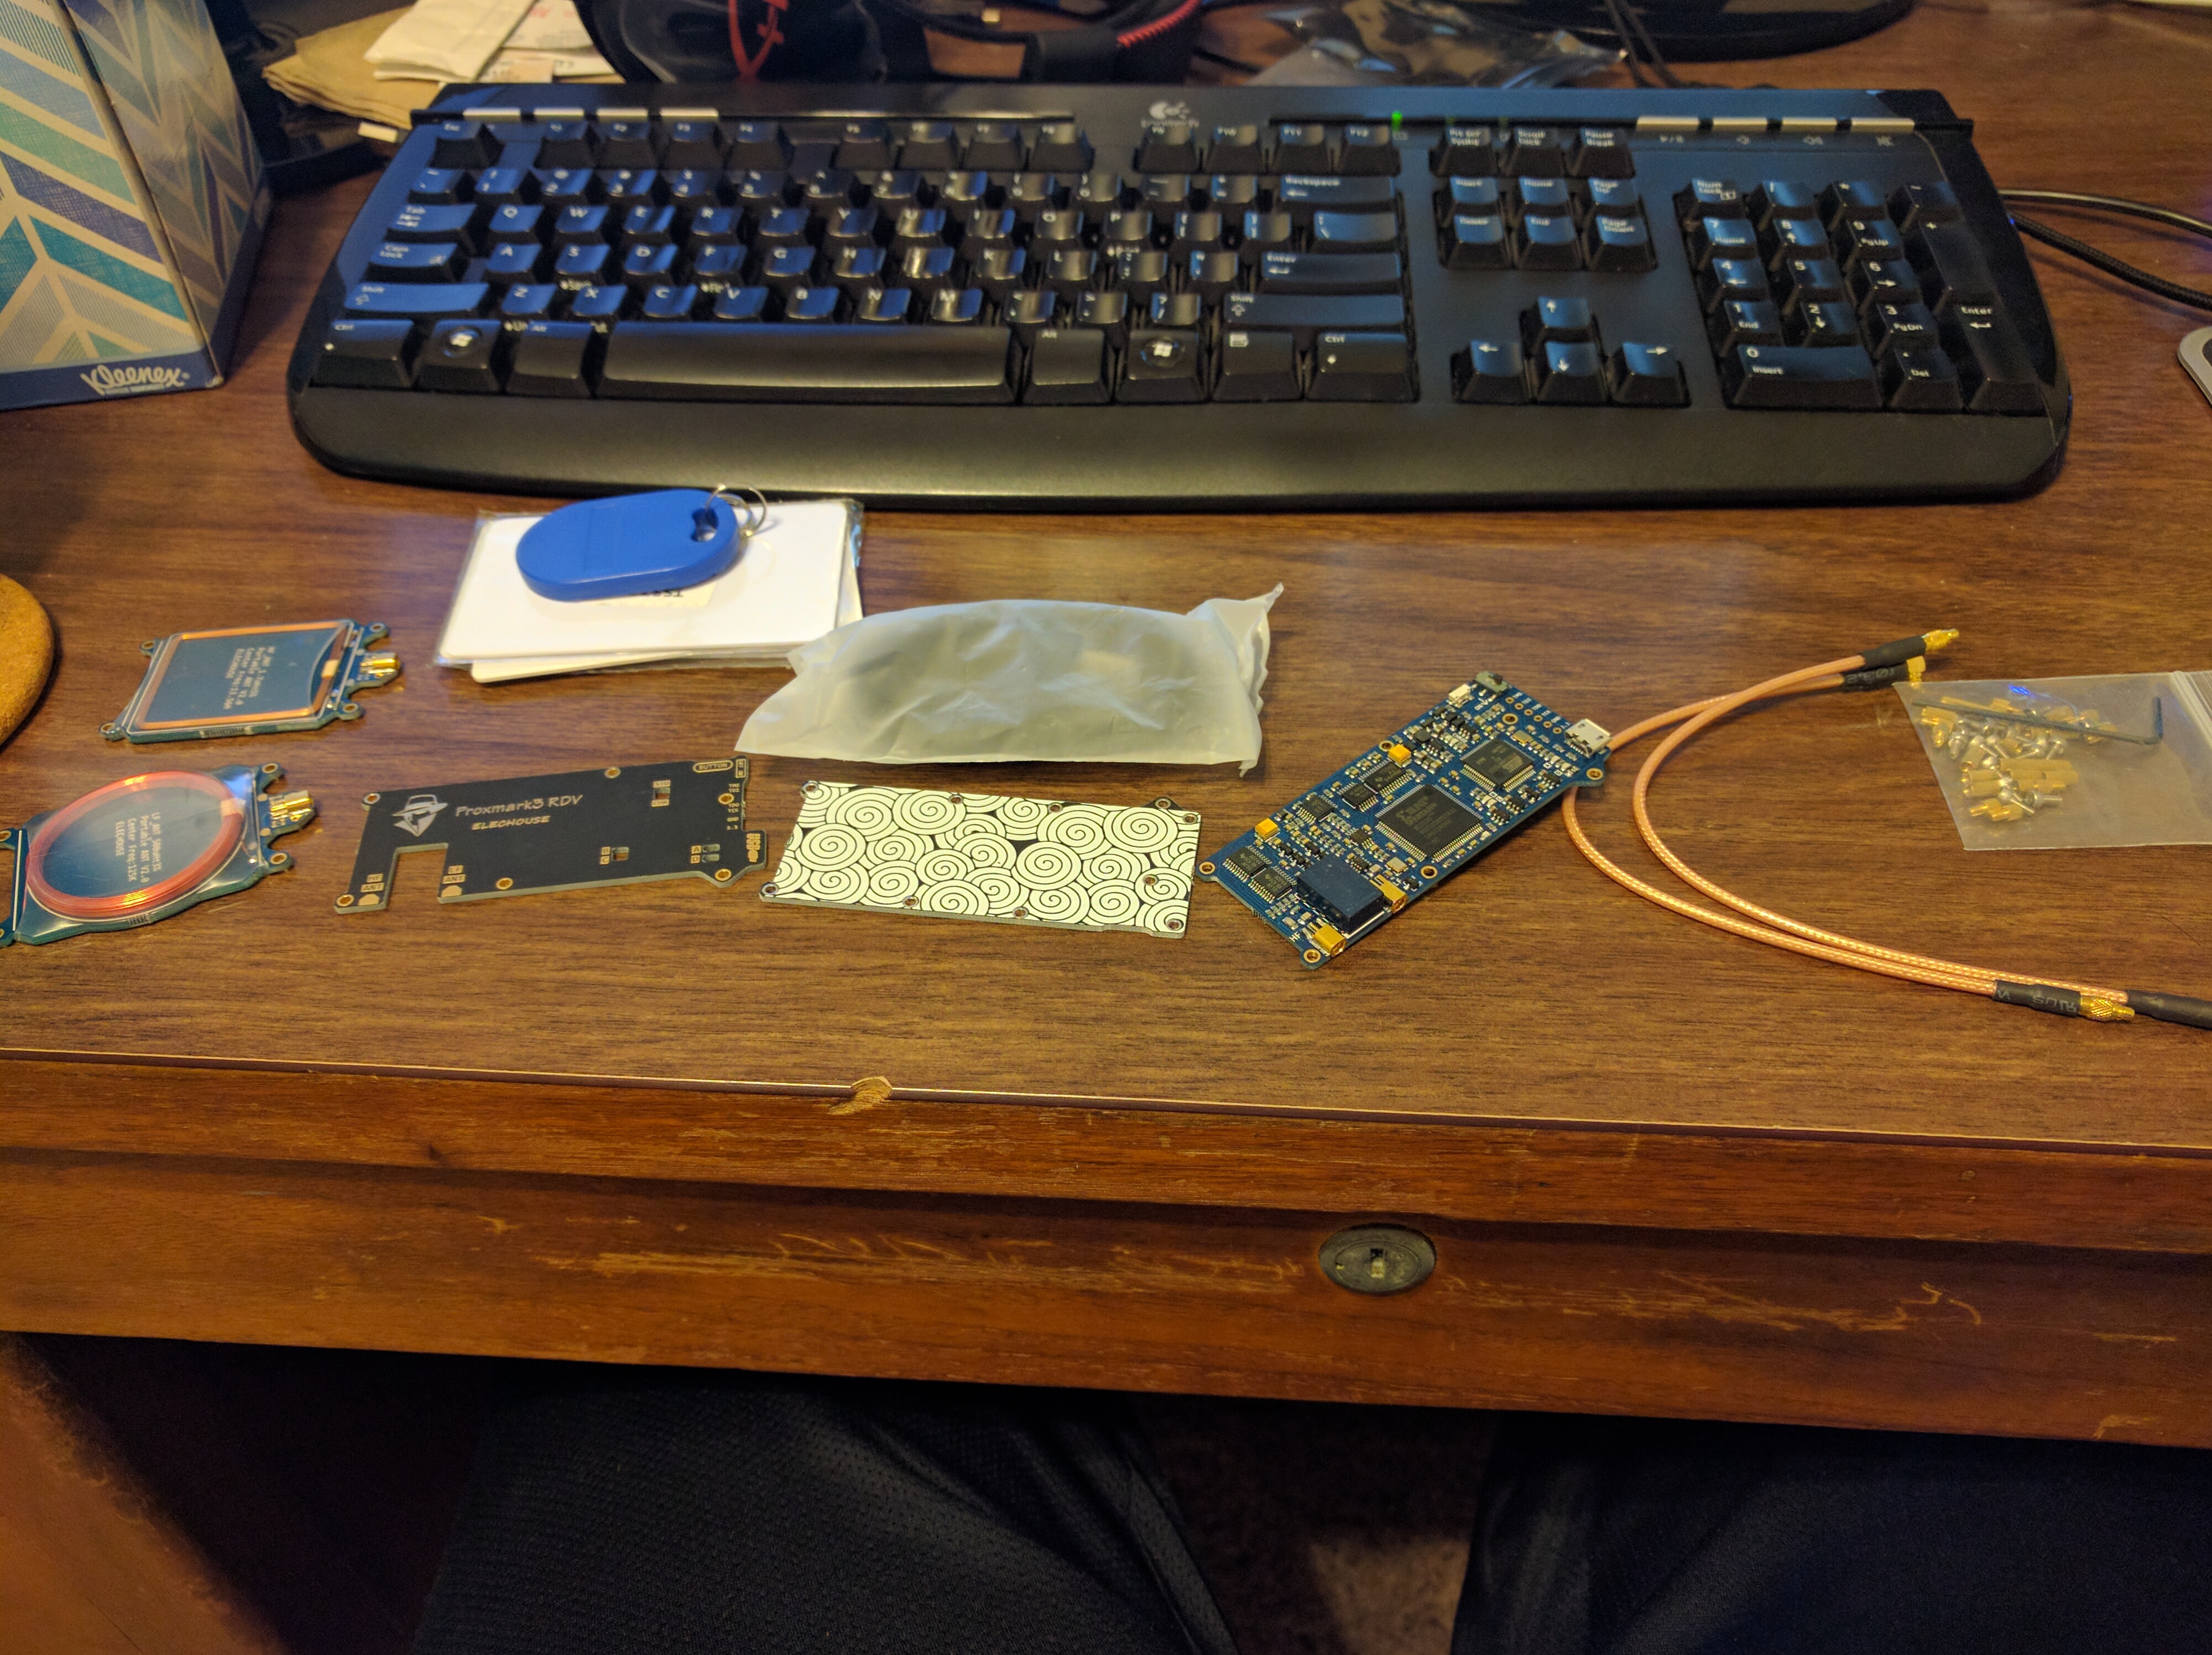
The first step was to attach the six risers to the board.
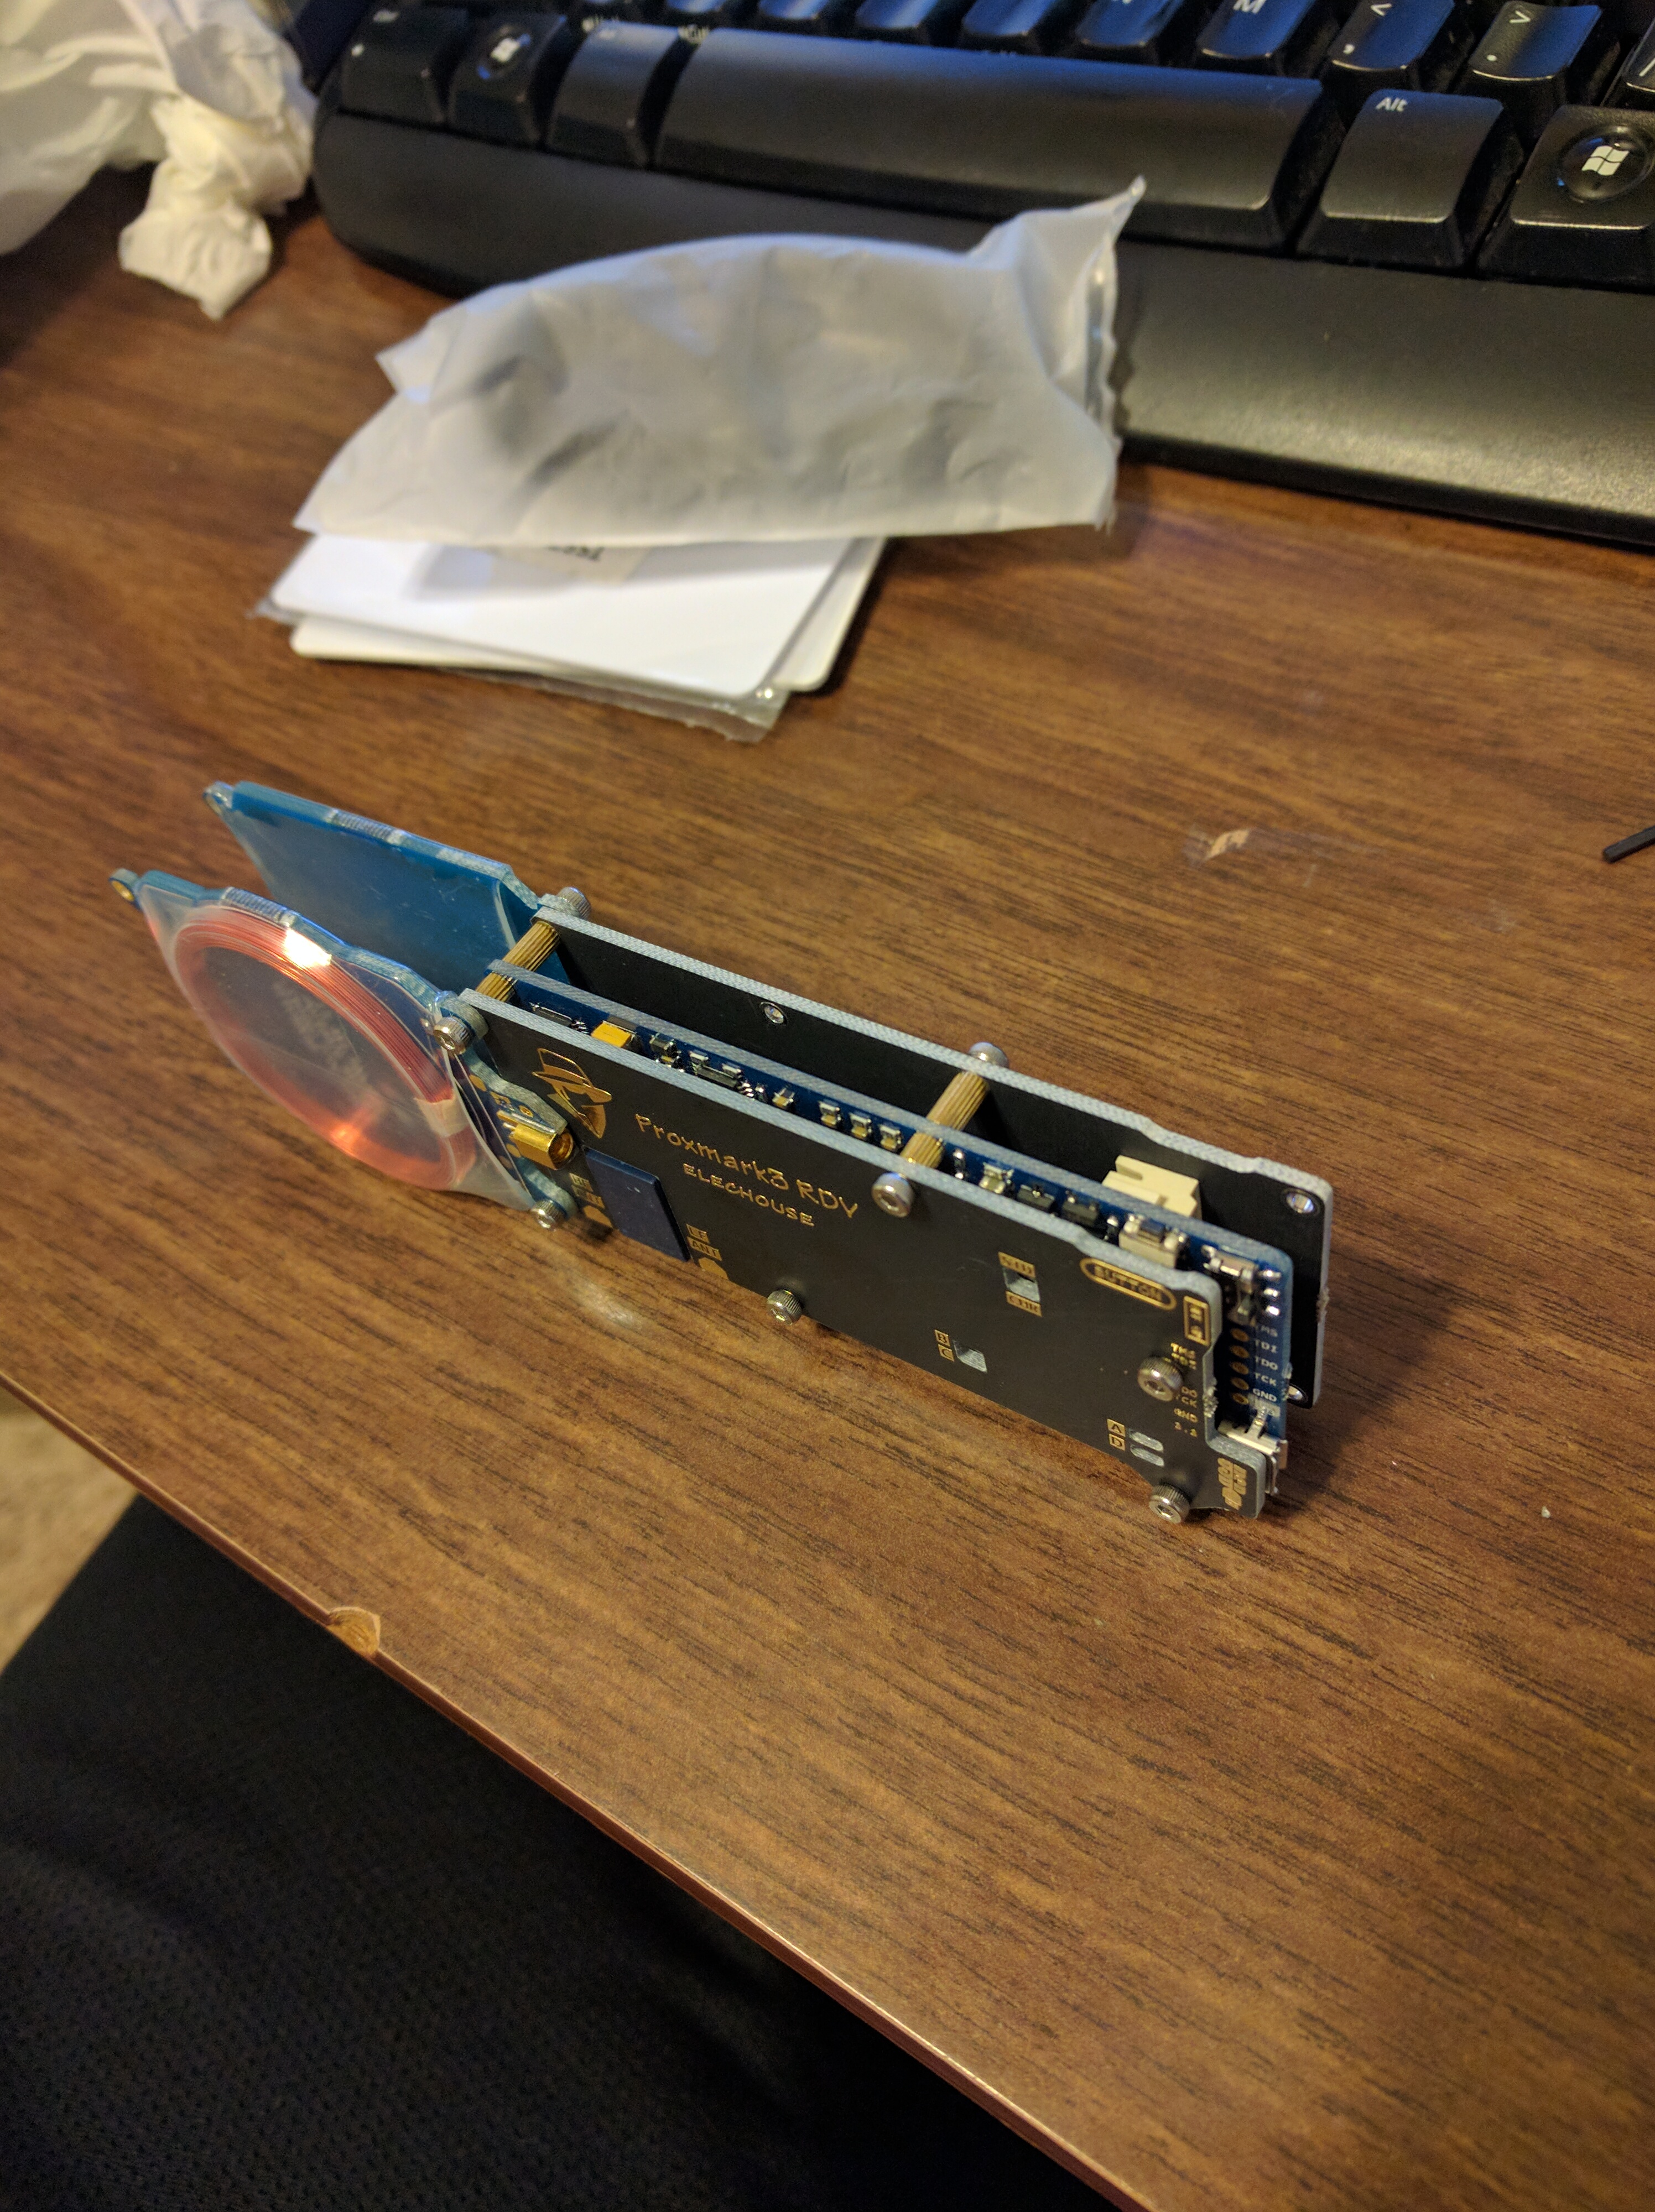
Next, I was able to attach the snazzy looking top cover.
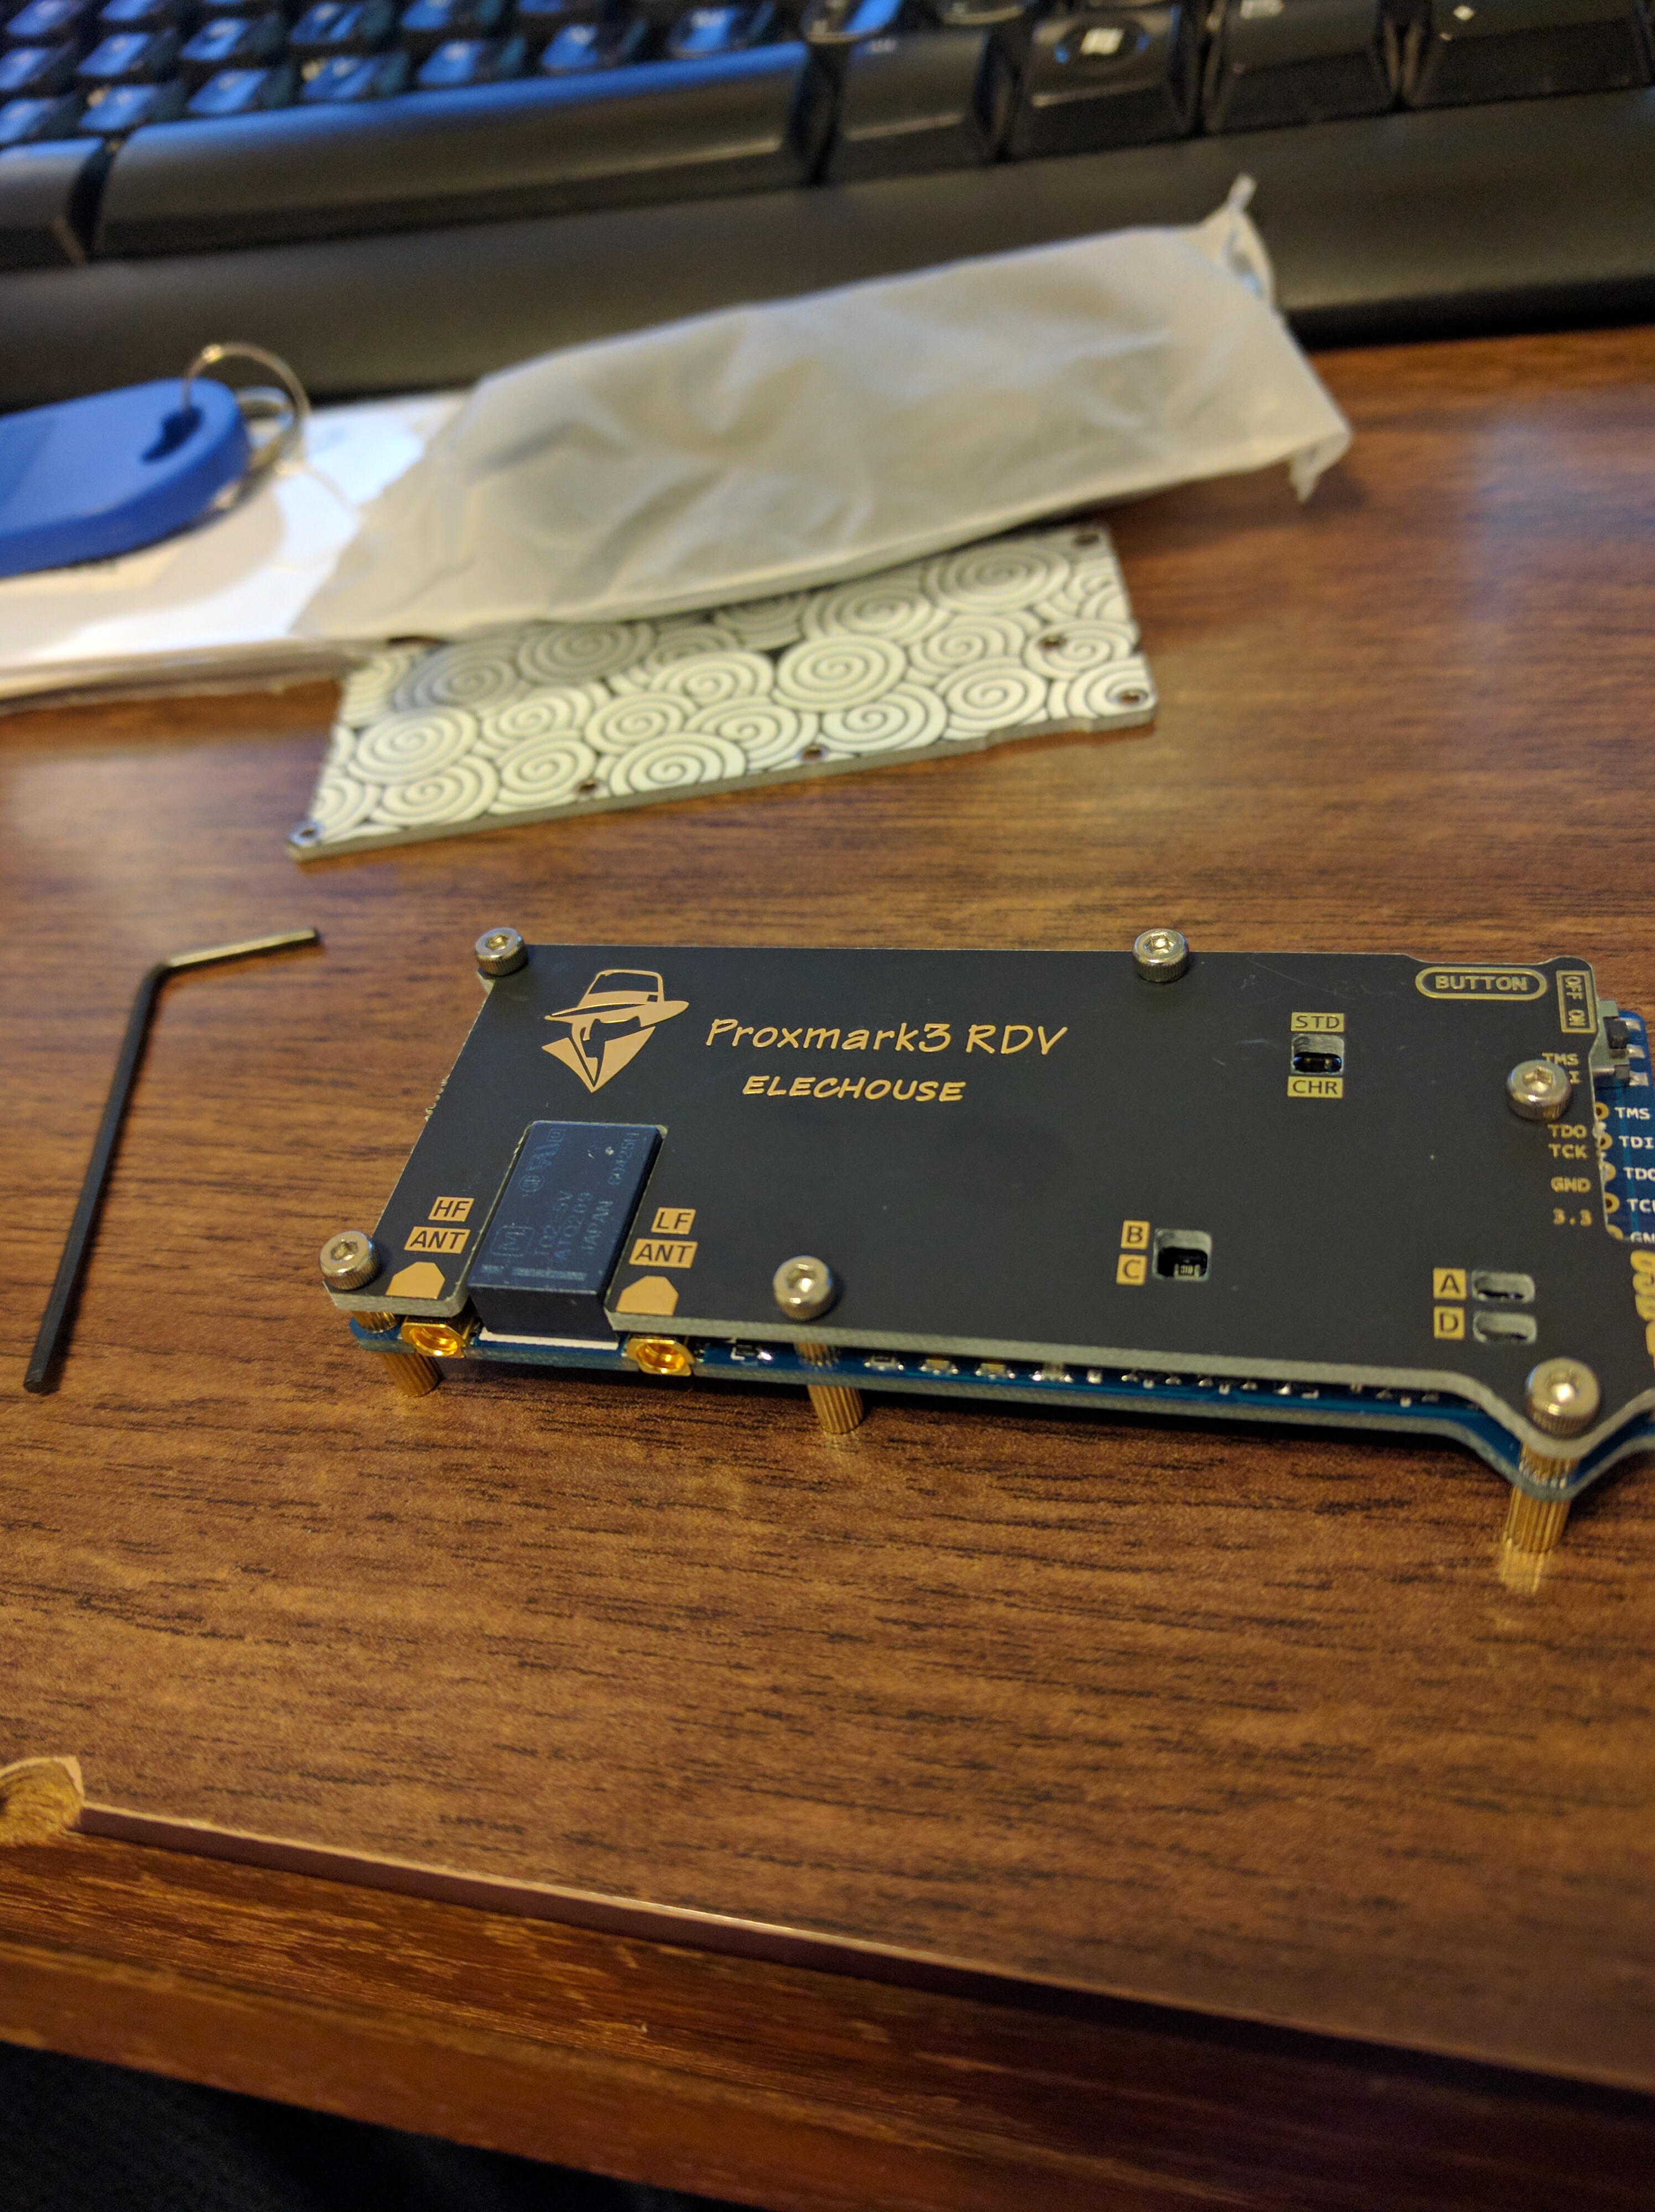
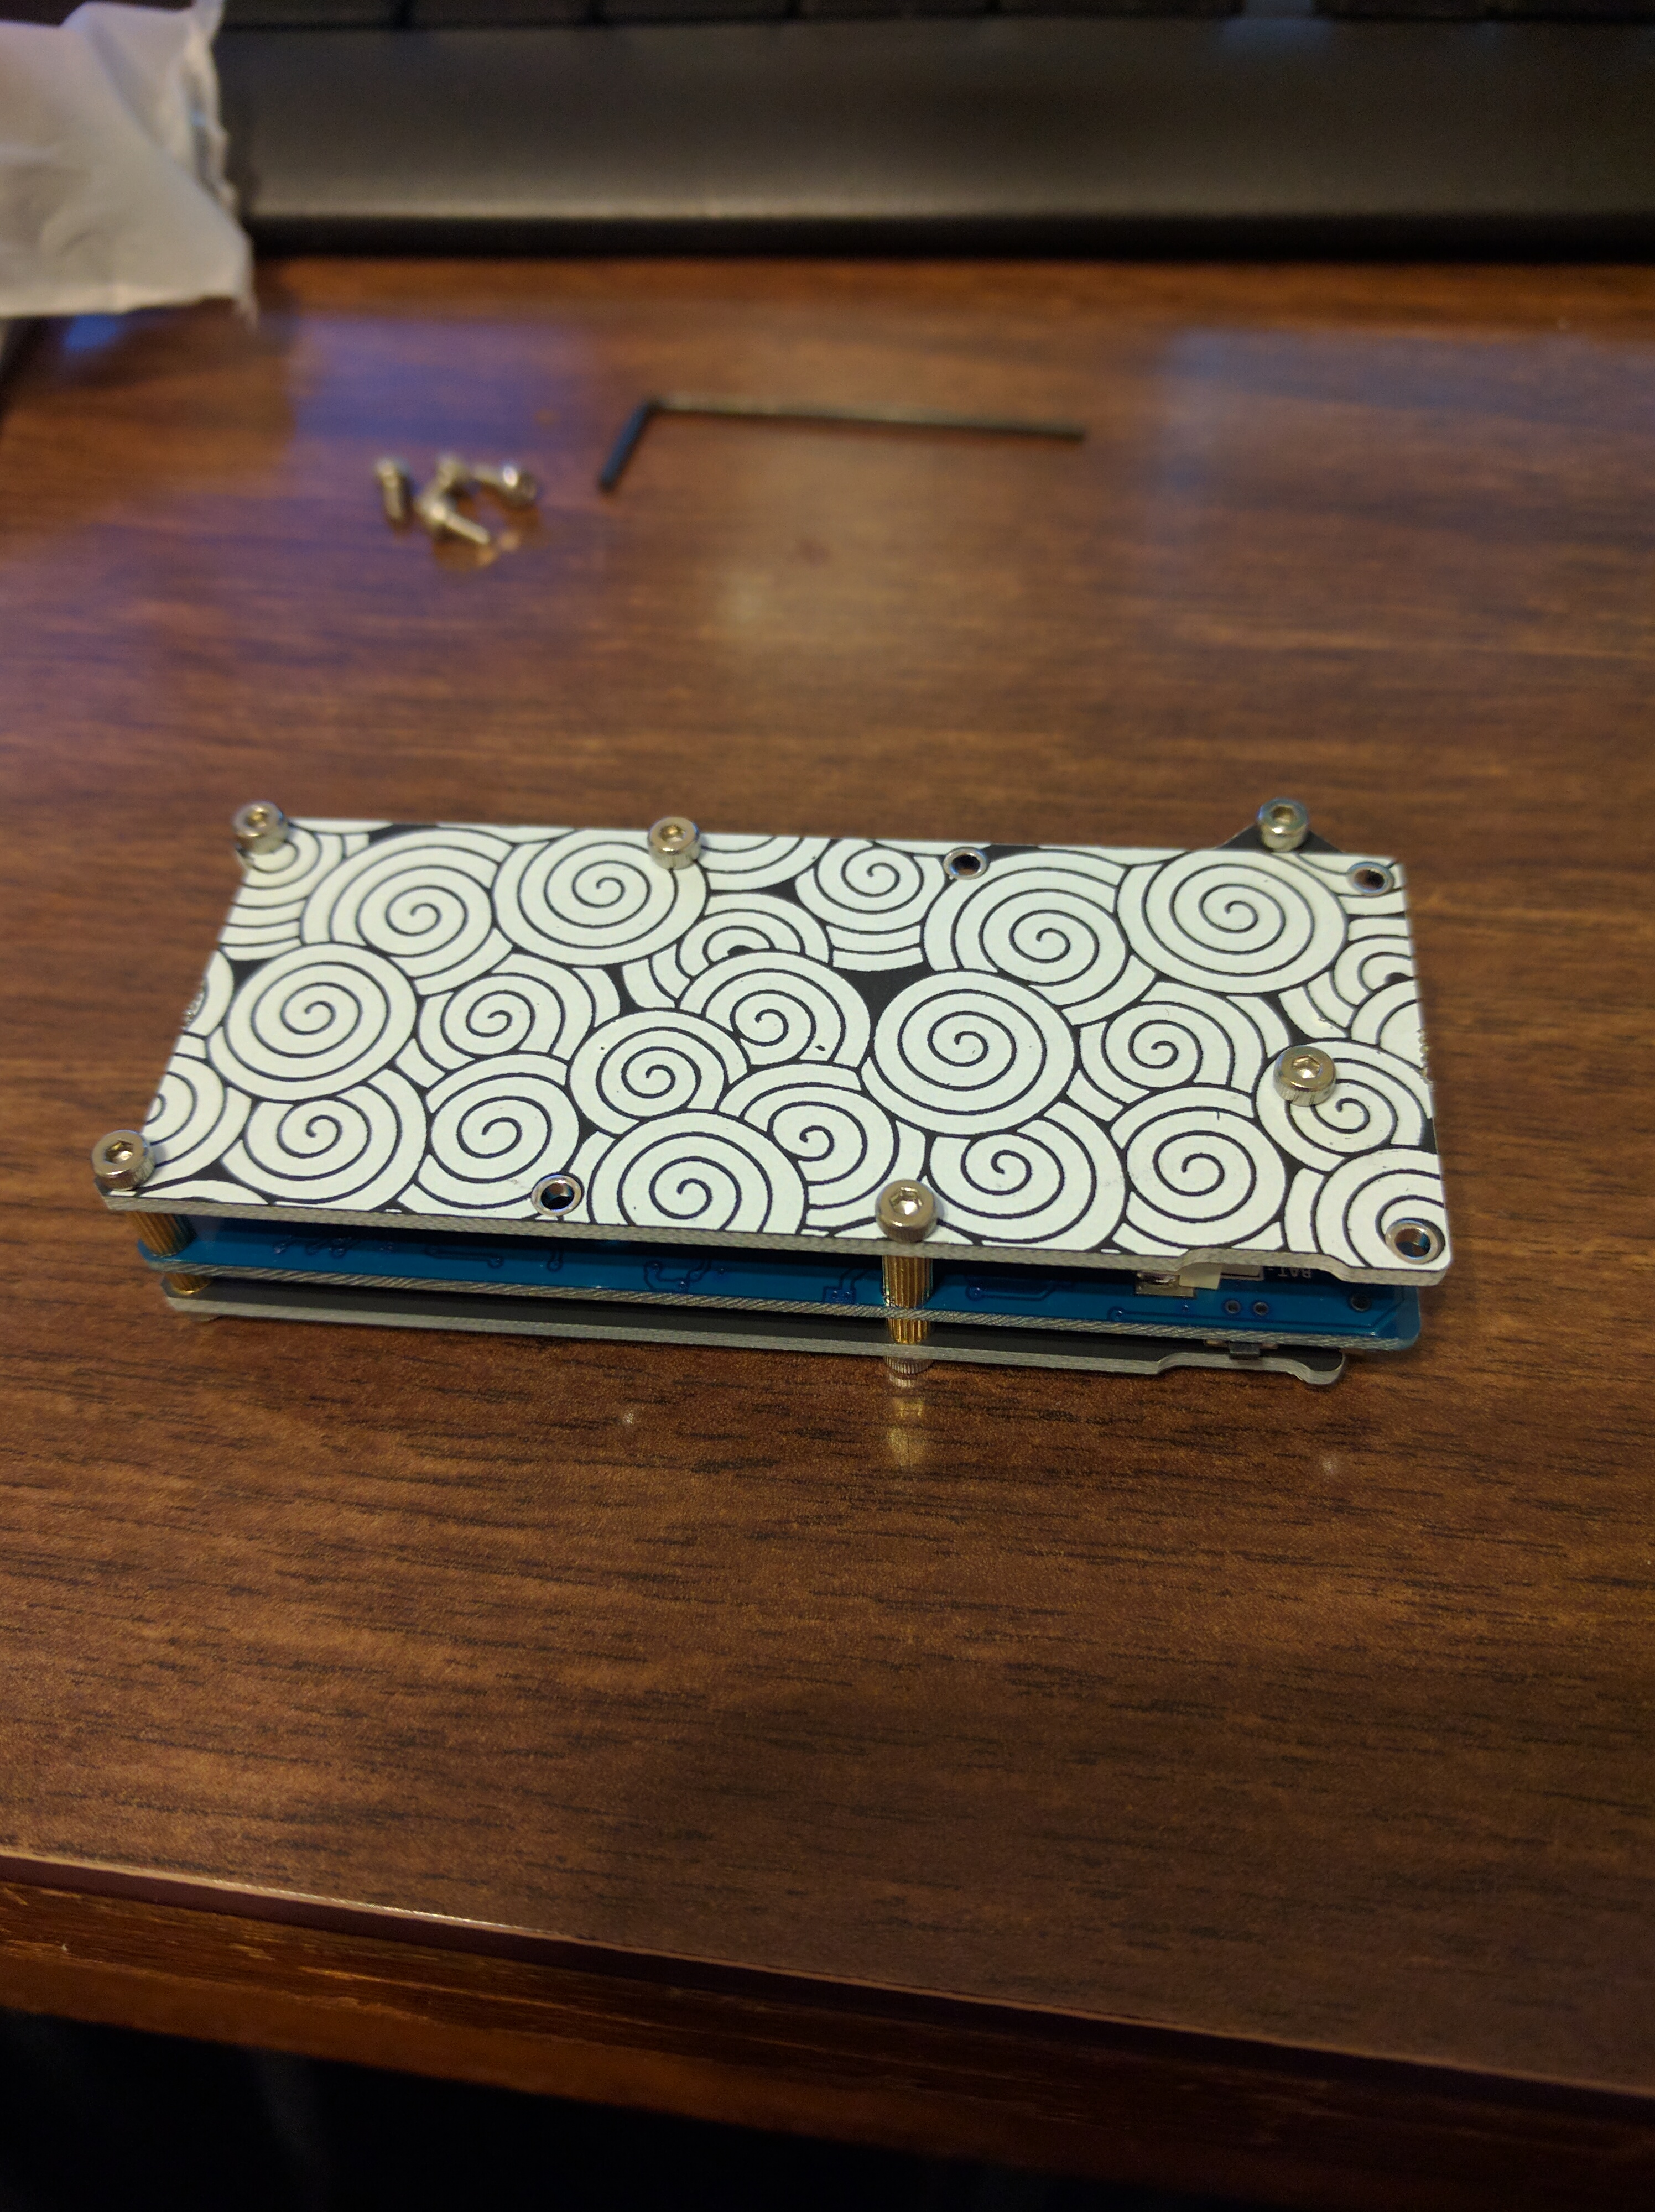
With the top cover in place, I then attached the crazy bottom cover to the other end of the risers.
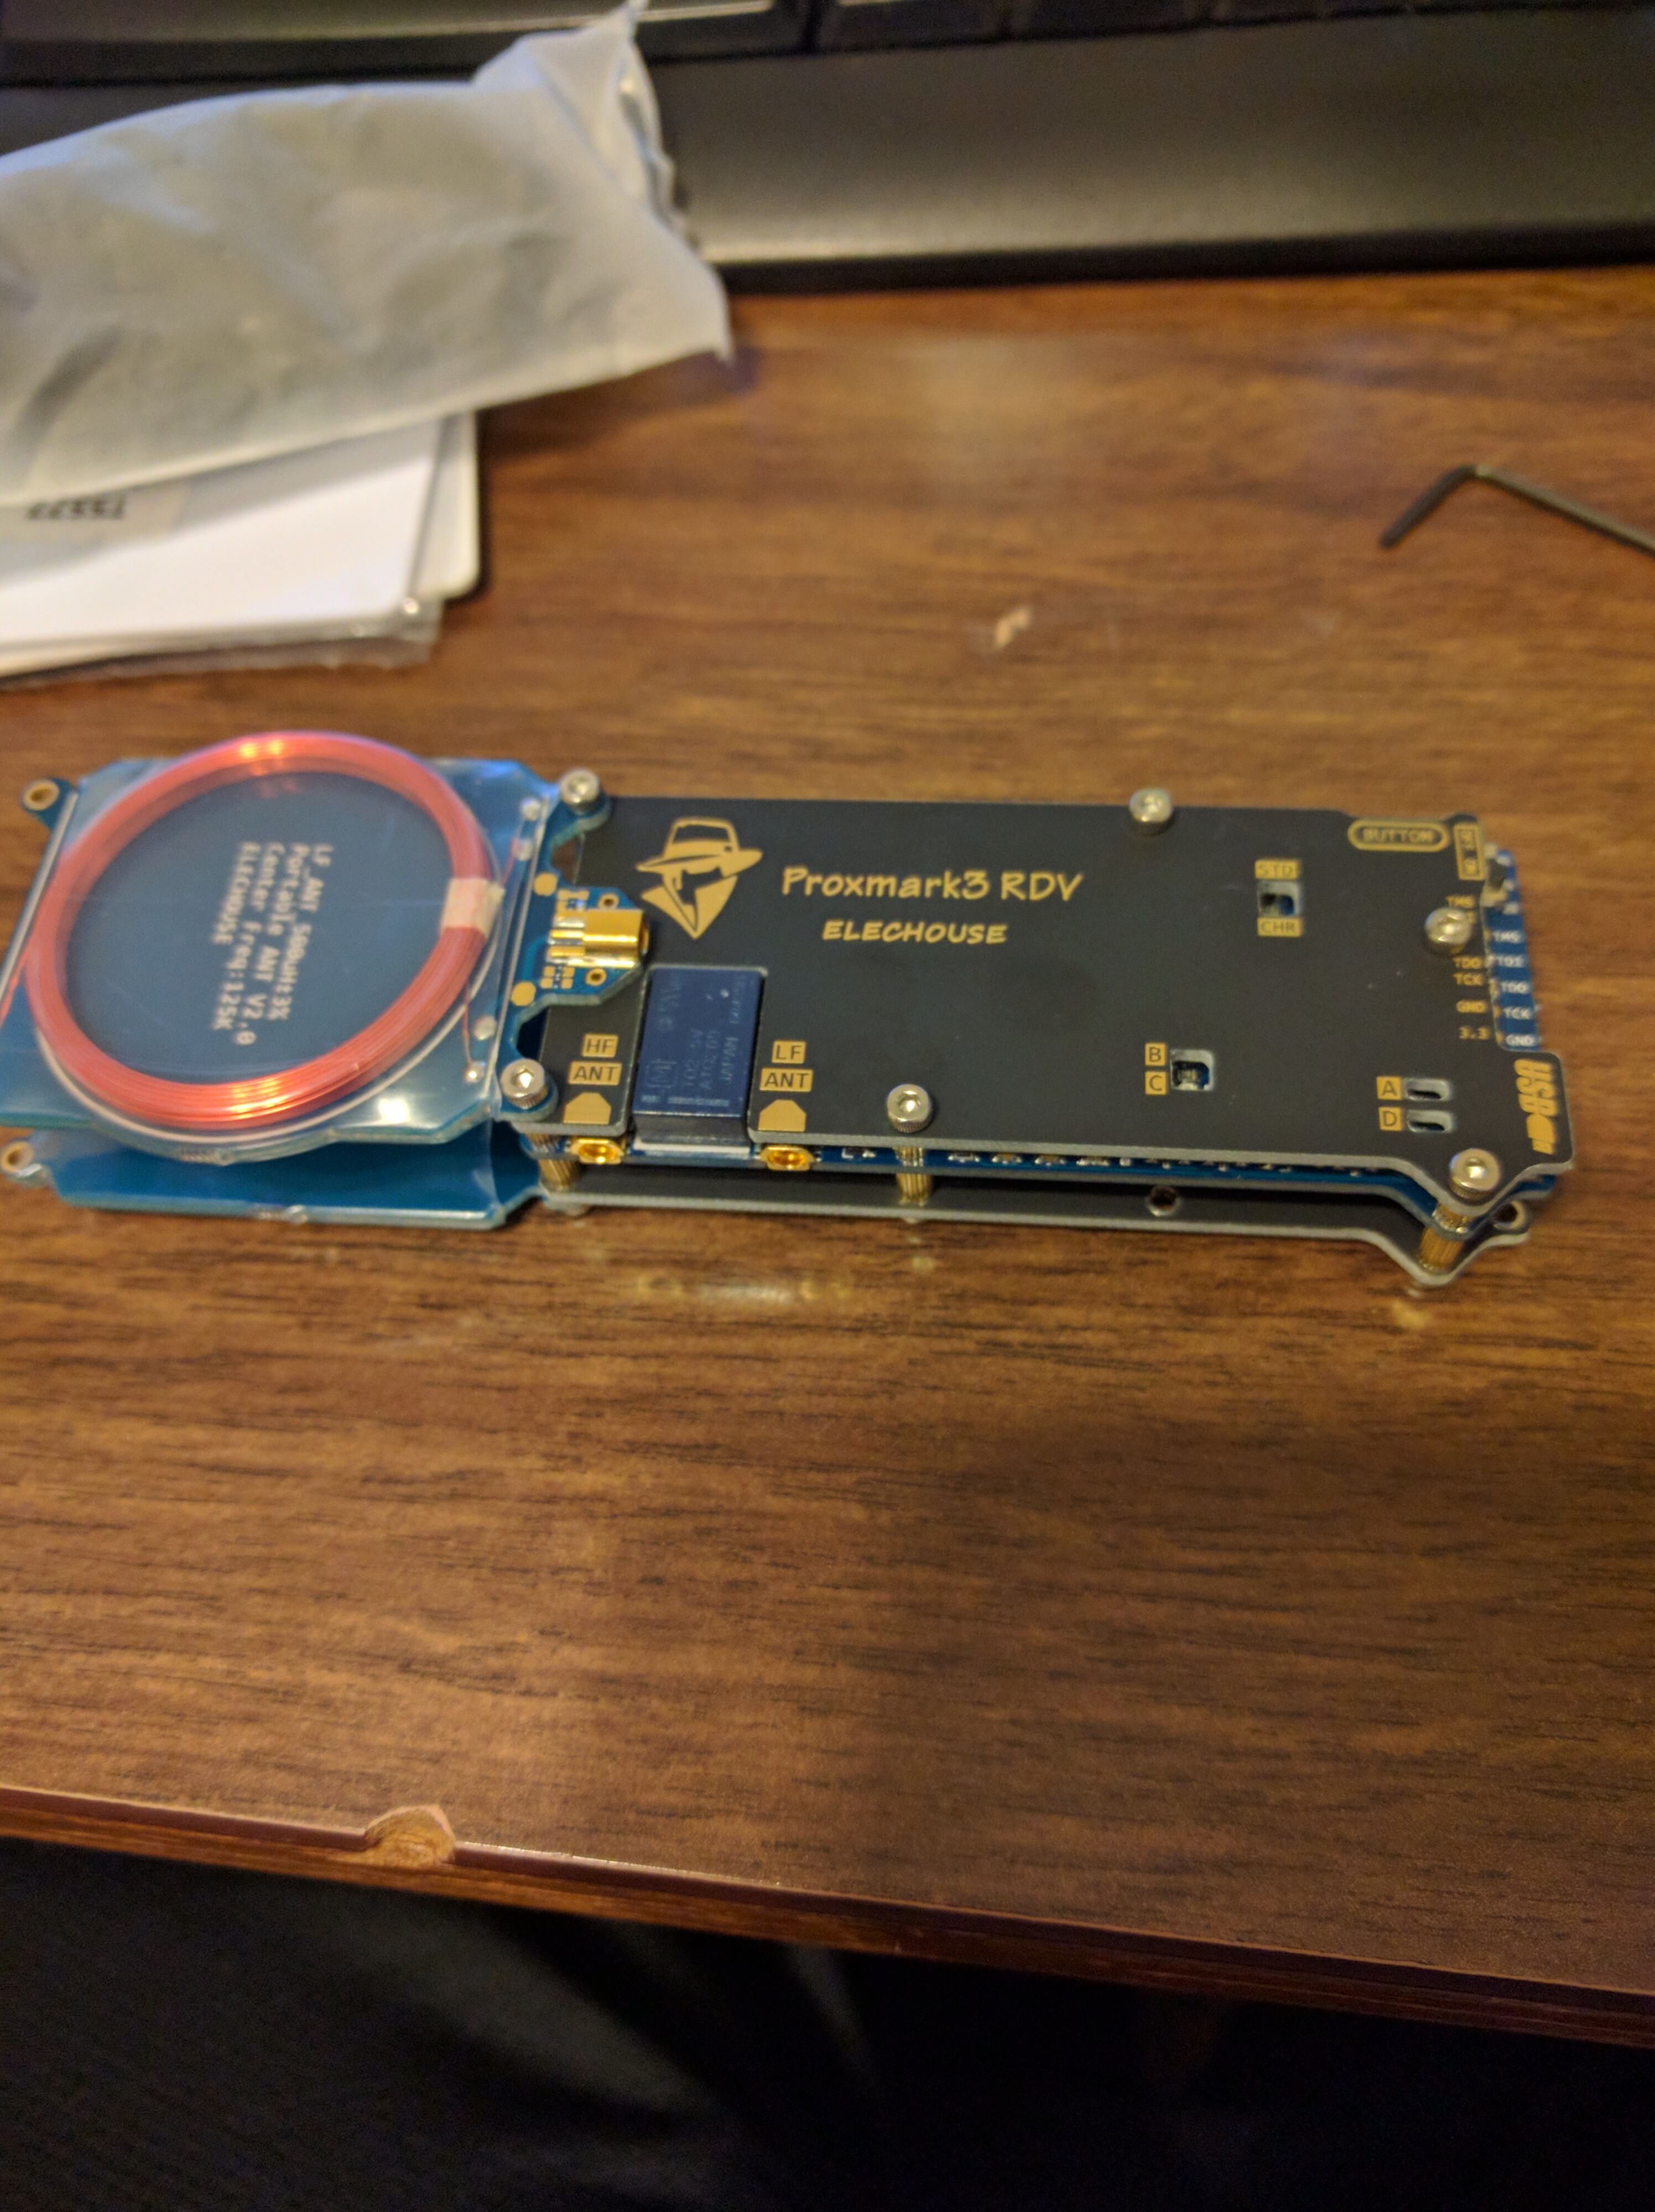
The next step was to attach the HF and LF antennas. These can attach in different ways to the top screws, but I went with a more even layout.
Looking at this from the top, you can really see how small it is.
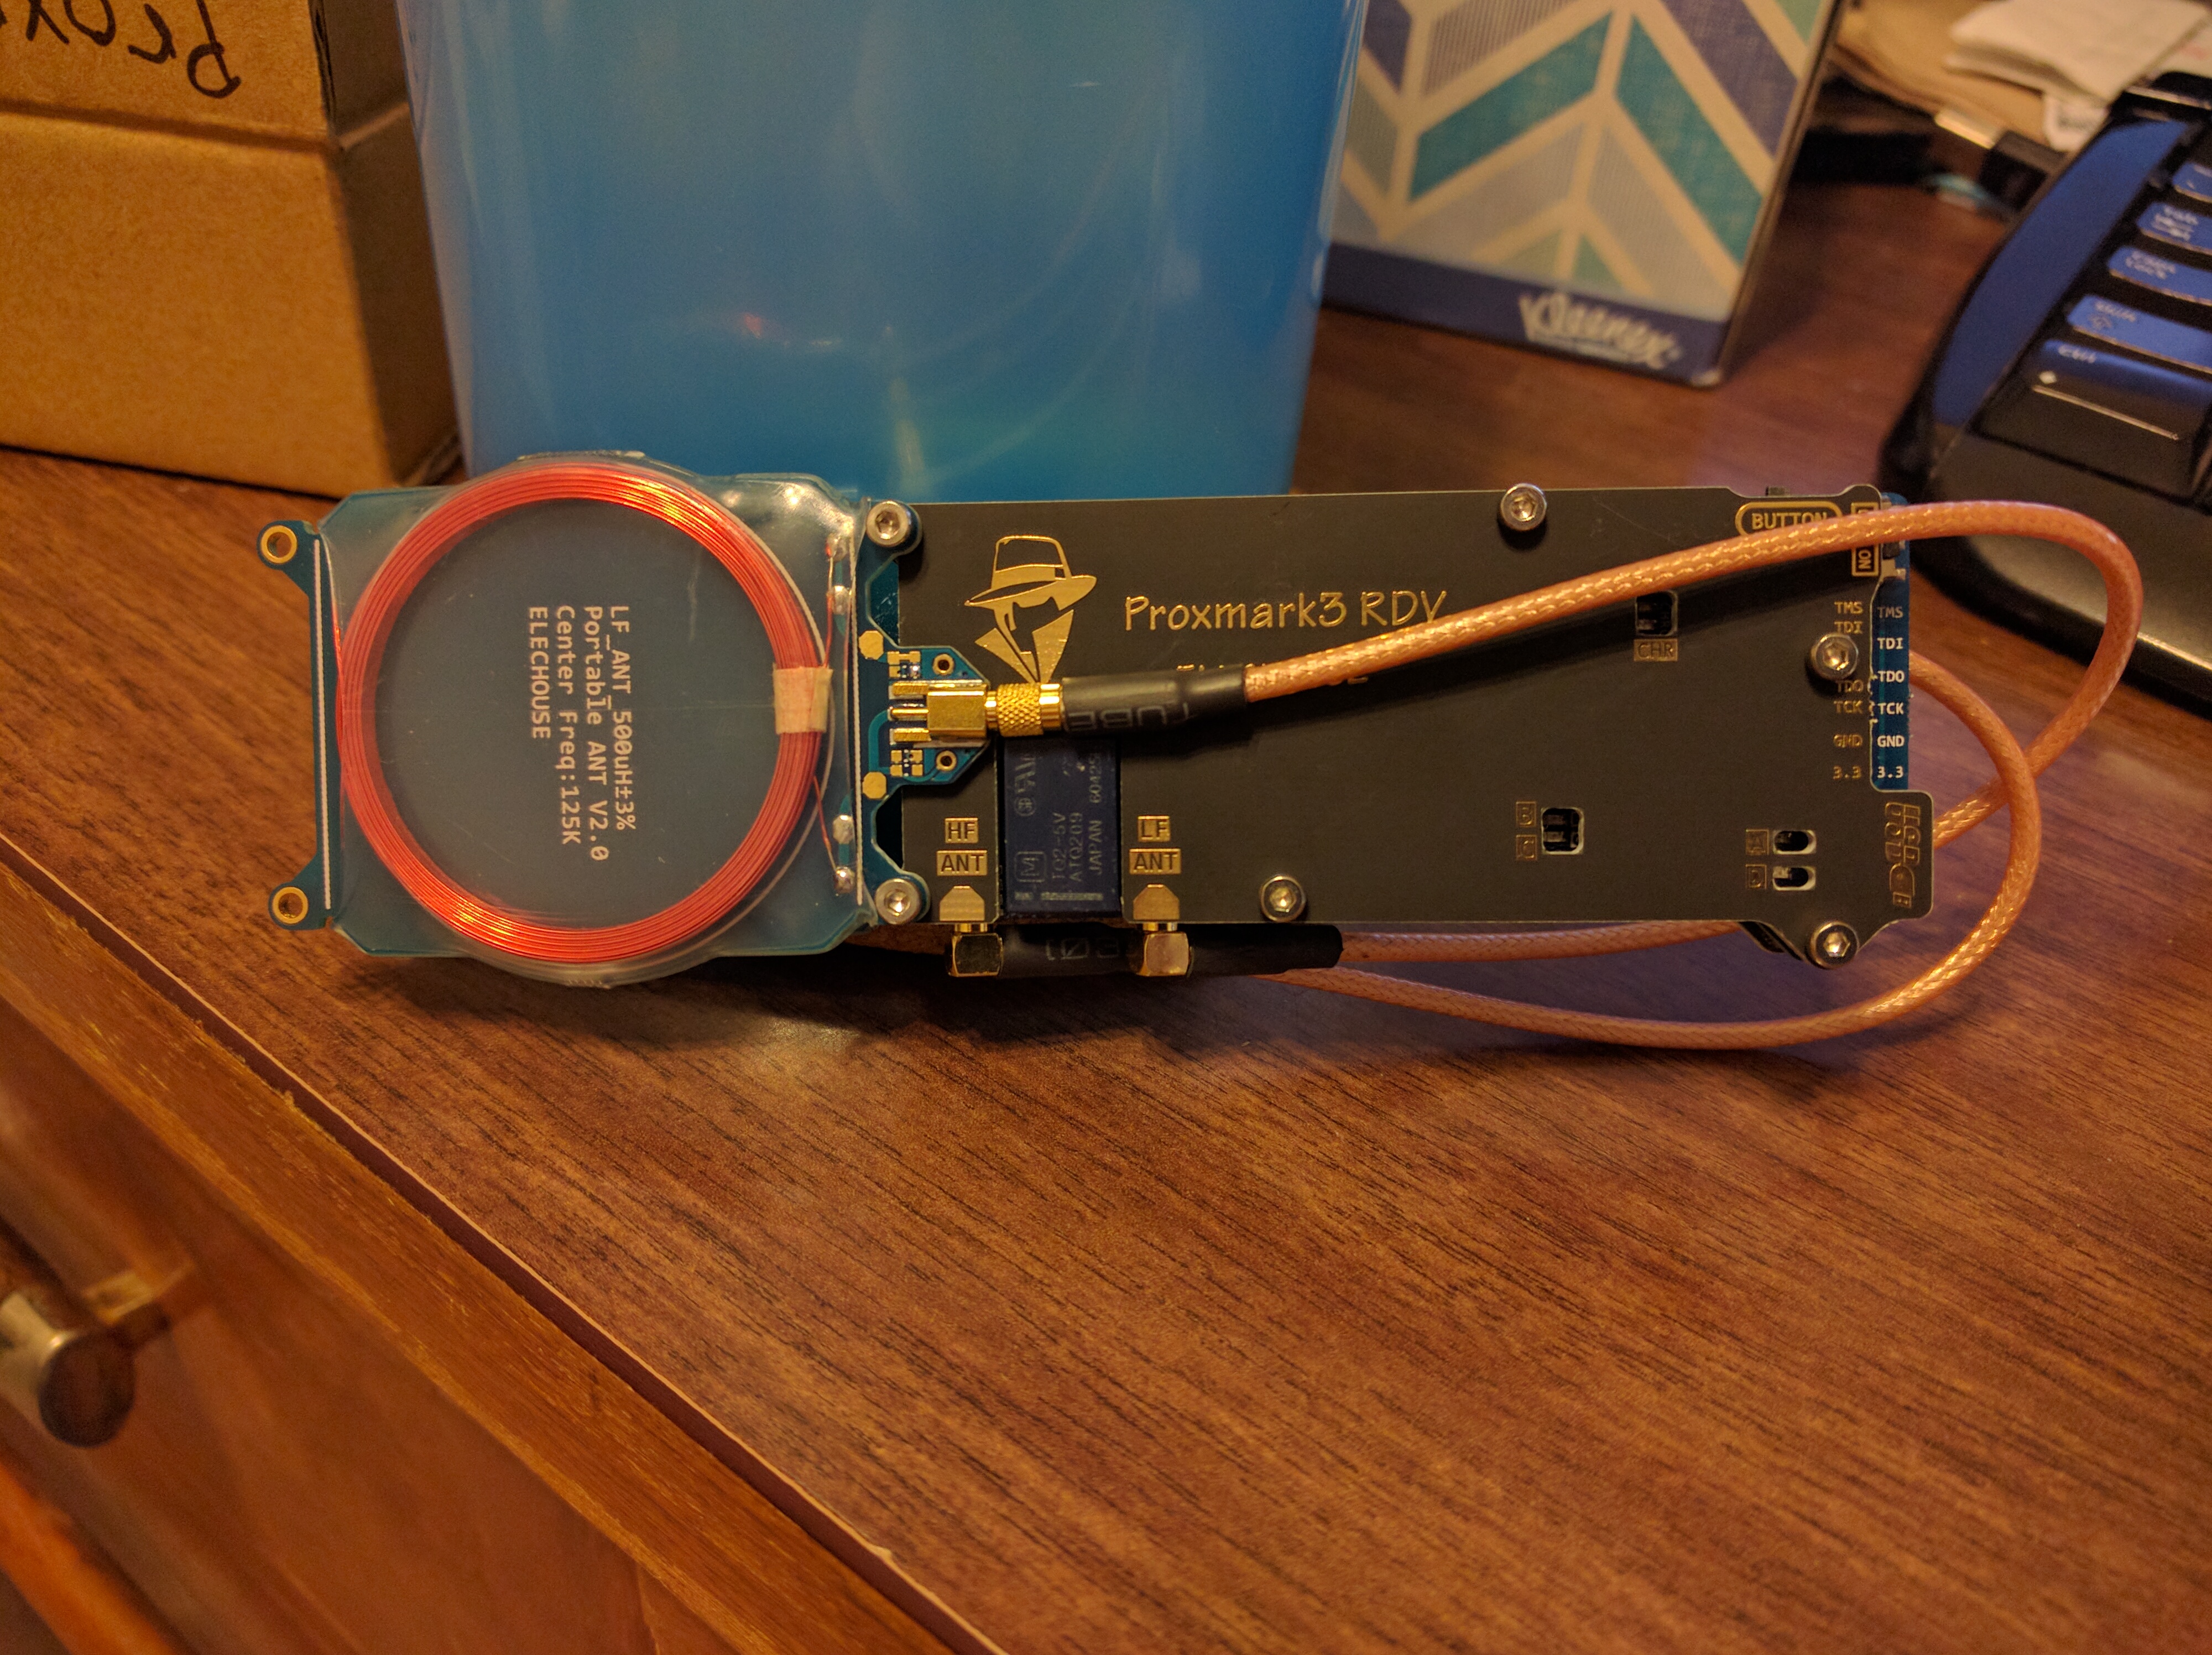
Once I attached the antennas, it was time to plug them in.
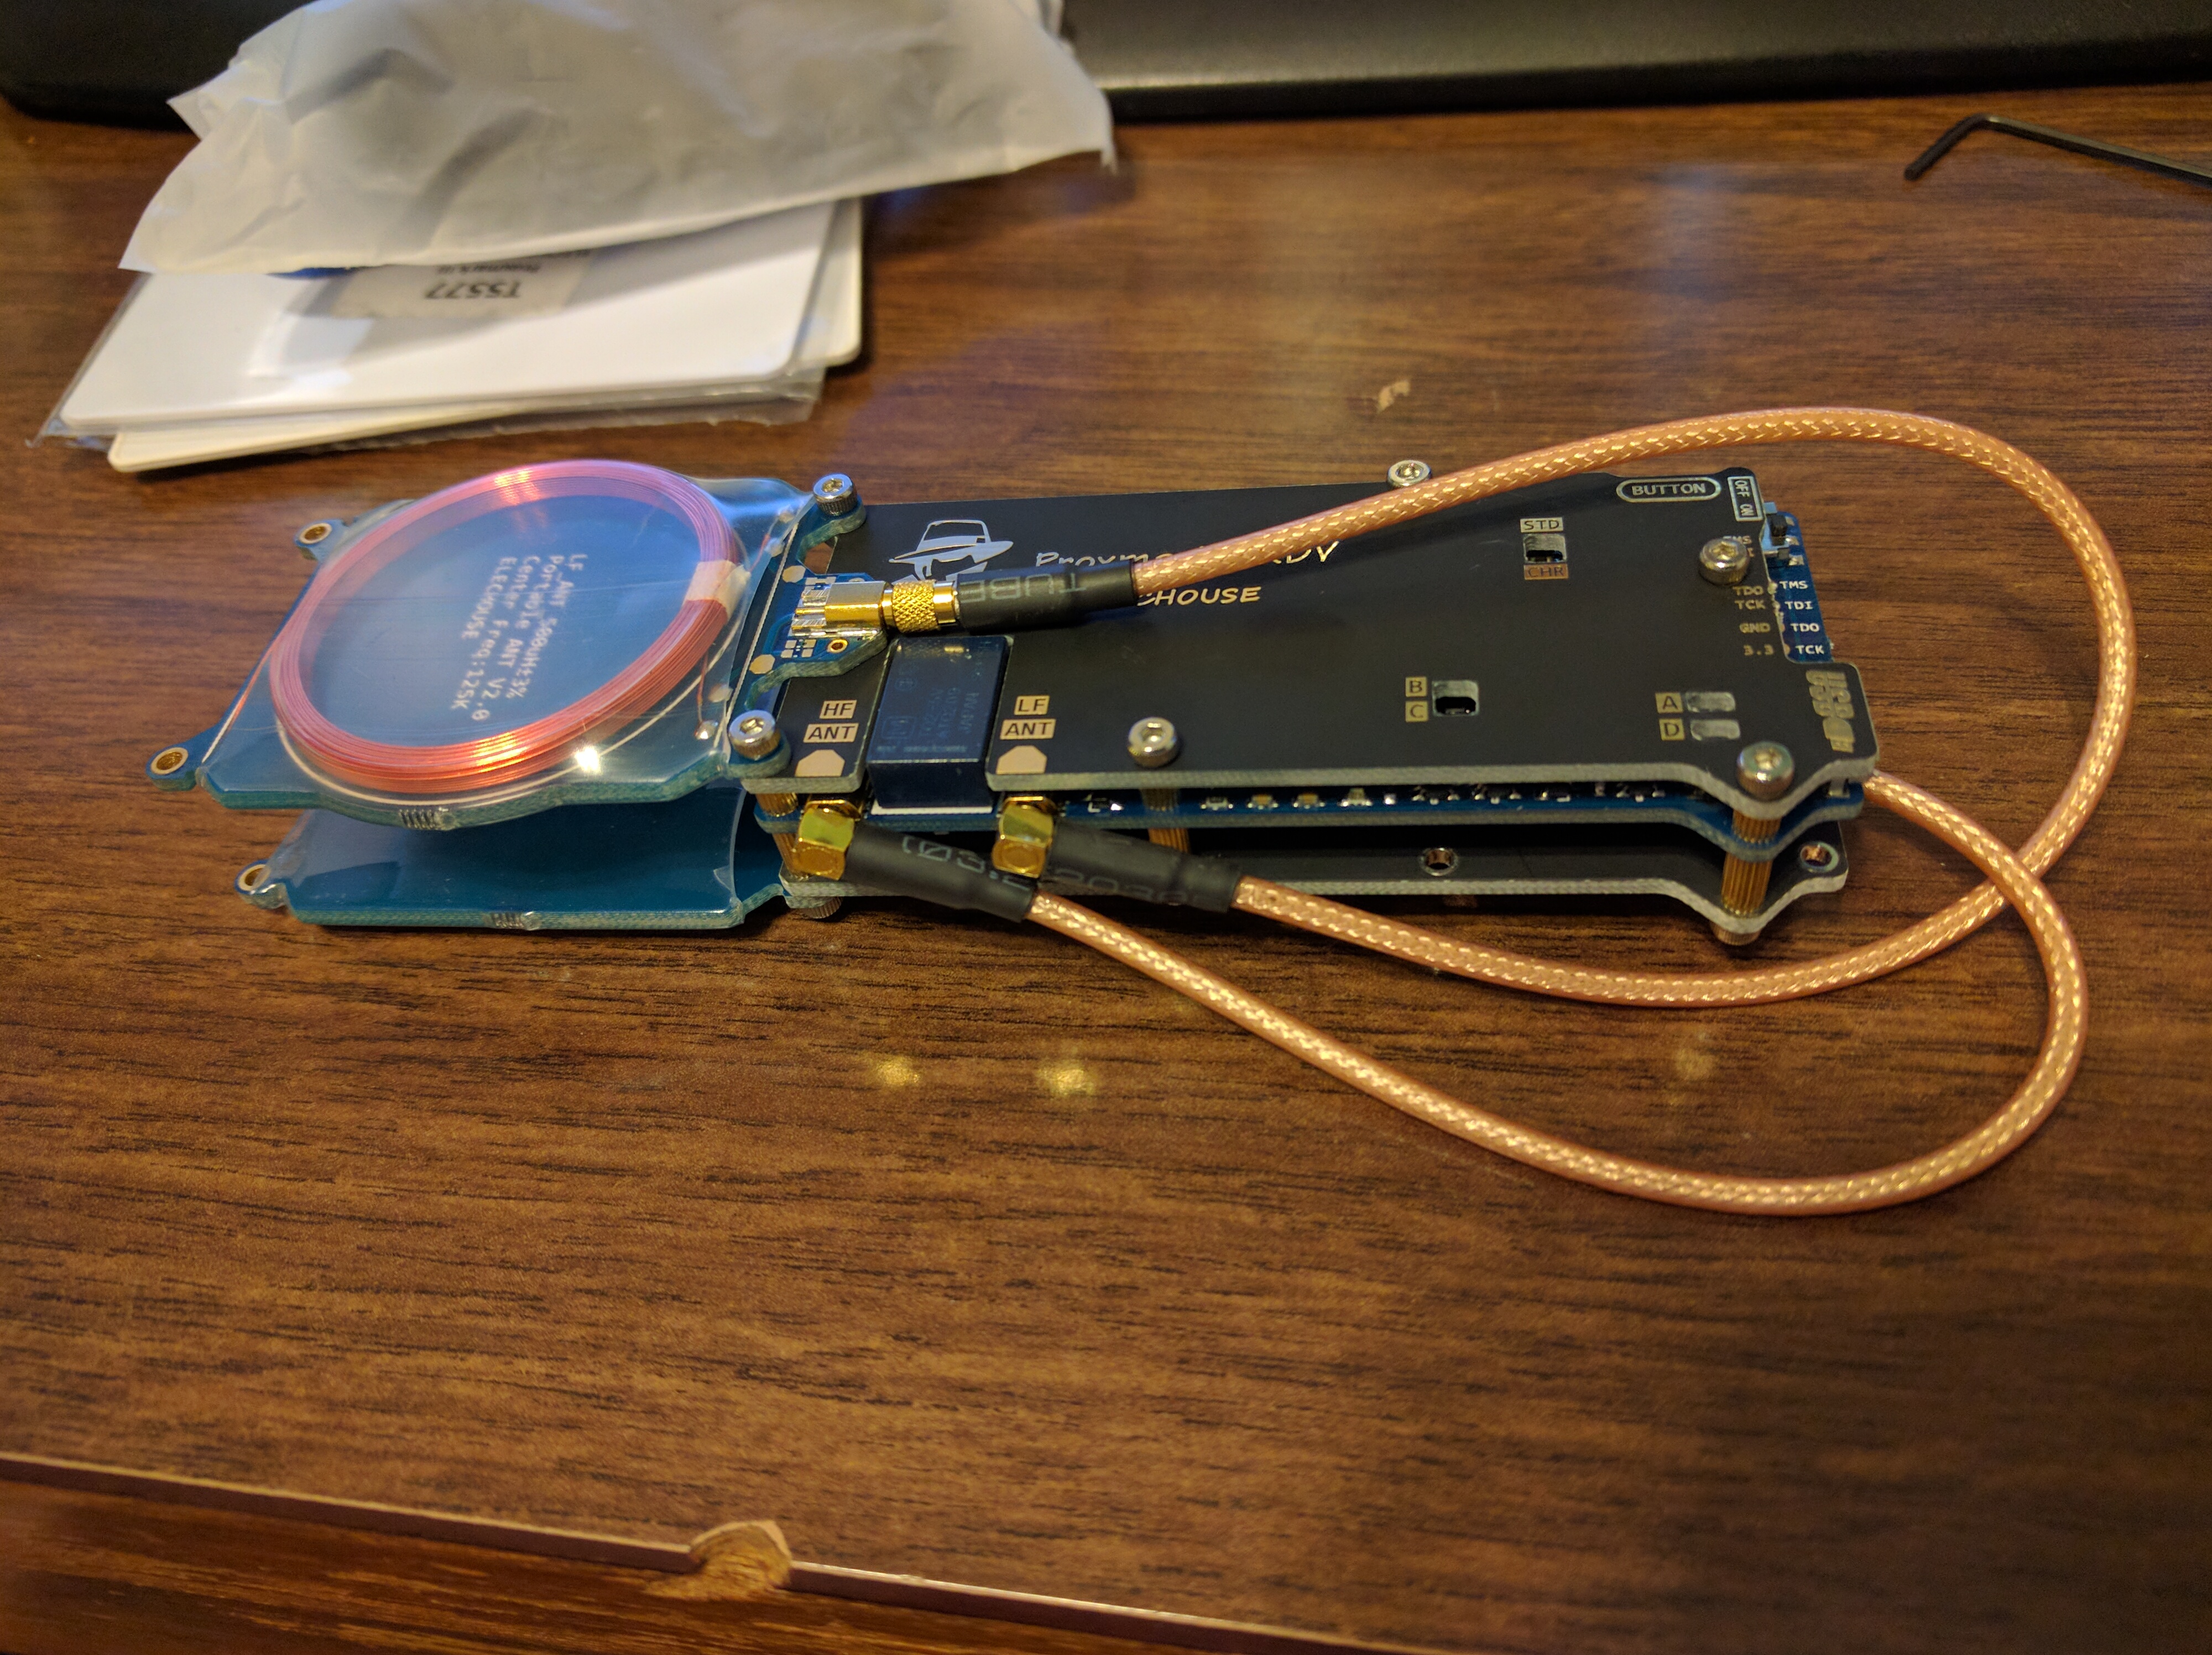
Finally, I had completed my Proxmark assembly! While not the most exciting assembly, I’m looking forward to playing with my new toy.
Though I have not had the chance to play with this yet, my first projects will be attempting to clone RFID badges. Other than that, let me know if you have any ideas or suggestions for it!
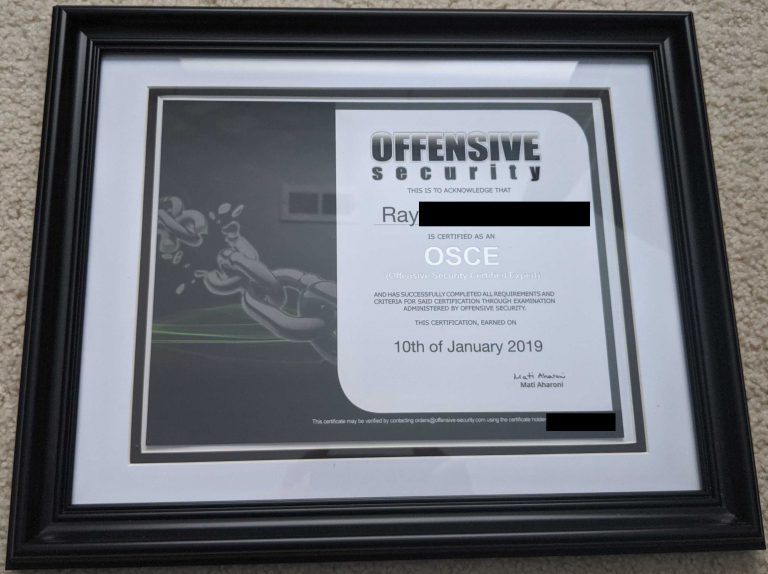
Ray Doyle is an avid pentester/security enthusiast/beer connoisseur who has worked in IT for almost 16 years now. From building machines and the software on them, to breaking into them and tearing it all down; he’s done it all. To show for it, he has obtained an OSCE, OSCP, eCPPT, GXPN, eWPT, eWPTX, SLAE, eMAPT, Security+, ICAgile CP, ITIL v3 Foundation, and even a sabermetrics certification!
He currently serves as a Senior Staff Adversarial Engineer for Avalara, and his previous position was a Principal Penetration Testing Consultant for Secureworks.
This page contains links to products that I may receive compensation from at no additional cost to you. View my Affiliate Disclosure page here. As an Amazon Associate, I earn from qualifying purchases.